Specific workflows
Workflow for Transfer to Control point
This purpose is selected when Documentary check will be performed at the BCP, and identity and physical checks will be performed at a Control point.
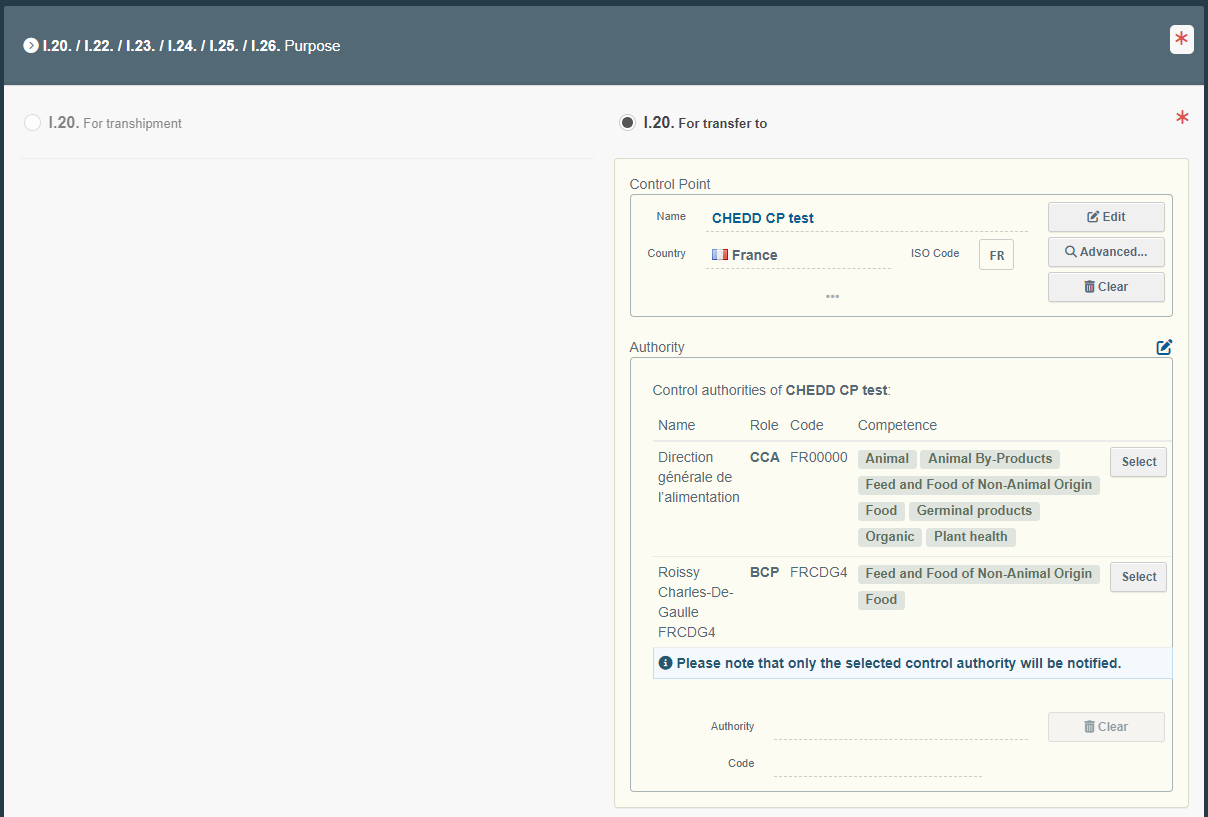
In the case of a consignment selected for identity and physical check to be performed at a Control Point, the operator responsible for the consignment can select in Box I.20 the option Transfer to Control Point.
In the Box, the operator must choose the Control point where the consignment will be sent (For the procedure on creation of a Control Point in TNT, go to section “Controlled location”). Once the Control point is selected, the system will display the Control authority/ies of that Control point.
If the control authority is selected at this stage, once the CHED will be finalised and in status Authorised for transfer, that control authority selected will be notified.
Selecting the authority at this stage is not mandatory. It can be selected also in Part I of the subsequent CHED.
 |
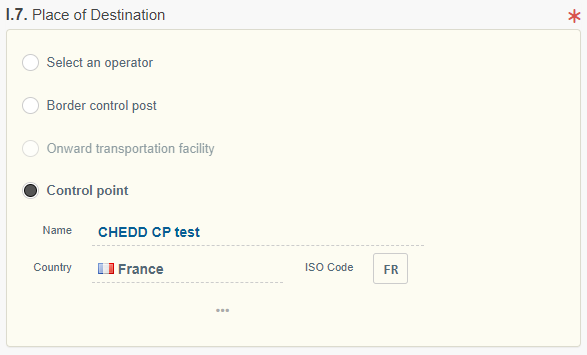
When the purpose I.20 is selected, Box I.7 Place of destination must be filled in with the information of the Control point.
 |
Once Part I of the CHED is completed, it can be submitted for decision to the BCP.
The BCP completes Part II of the CHED and registers the Documentary check only.
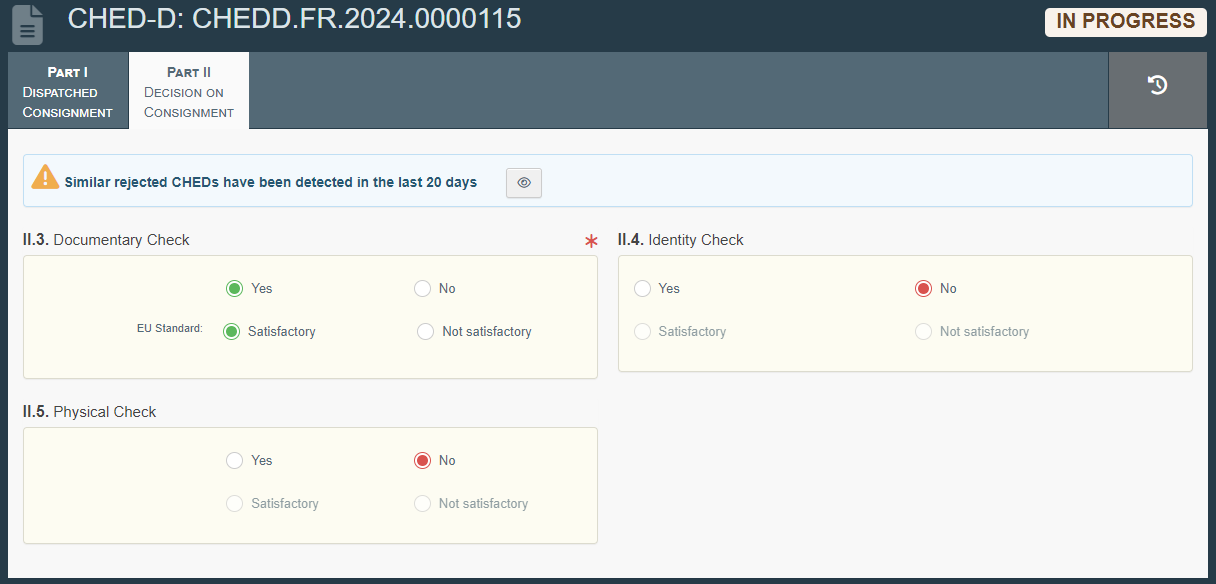 |
If the outcome of the check is Satisfactory, the BCP clicks on “Authorise for transfer” and sign the validation.
 |
Note that when the purpose selected is “transfer to control point”, box I.27 Means of transport after BCP becomes mandatory.
The result will be a first CHED-D, with only Documentary check registered, and in Status “Authorised for transfer”. But the workflow is not completed, as the consignment is now authorised to move to the Control Point, for further Official Controls.
The operator responsible for the consignment mentioned in the first CHED, has the possibility to click on “Transfer”, from the action button, and create a so-called subsequent CHED. The subsequent CHED is the prior notification to be sent to the Control Authority of the Control point, who will perform the identity and physical check on the consignment.
The “transfer” action can also be performed by the control authority/ies of the Control Point.
 |
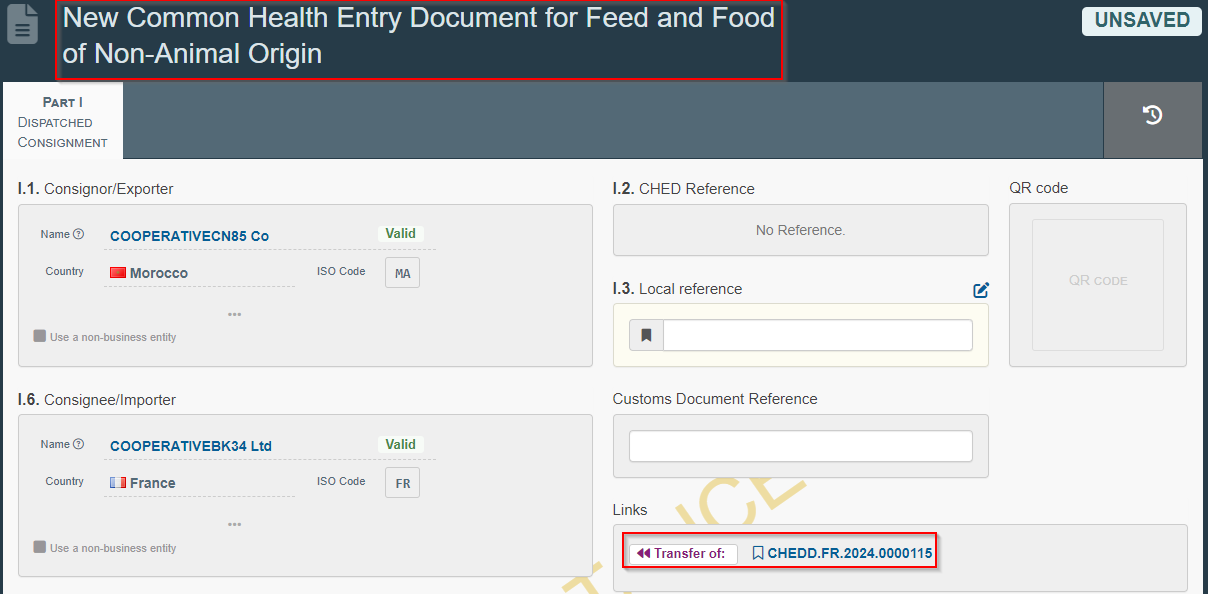
The subsequent CHED is a new CHED linked to the first, with almost all data in Part I copied from the first CHED.
 |
The operator responsible for the consignment must fill in the following missing information in Part I:
Box I.4: The control authority in charge of performing the identity and physical check at the Control Point (if not selected in Box I.20 of the first CHED)
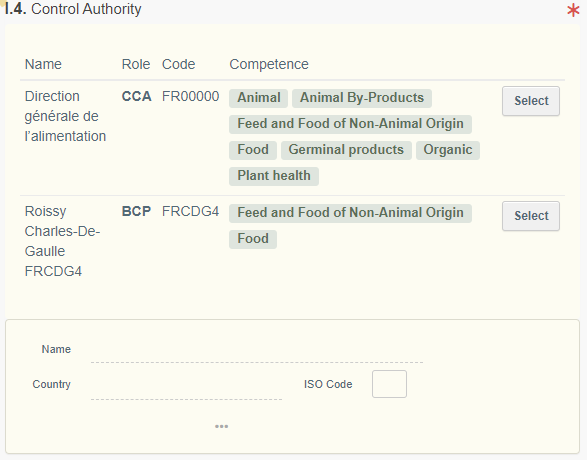
There can be more than one control authority for the same Control point, but only one can be selected.
The authority selected here will receive the notification of the submission of the CHED (prior notification of the consignment arriving at the control point) and will be able to access and complete it.
Box I.10: Estimated date and time of arrival of the consignment at the Control point

Box I.23: the only purpose that can be selected in a subsequent CHED of a Transfer to Control point is “Internal market”
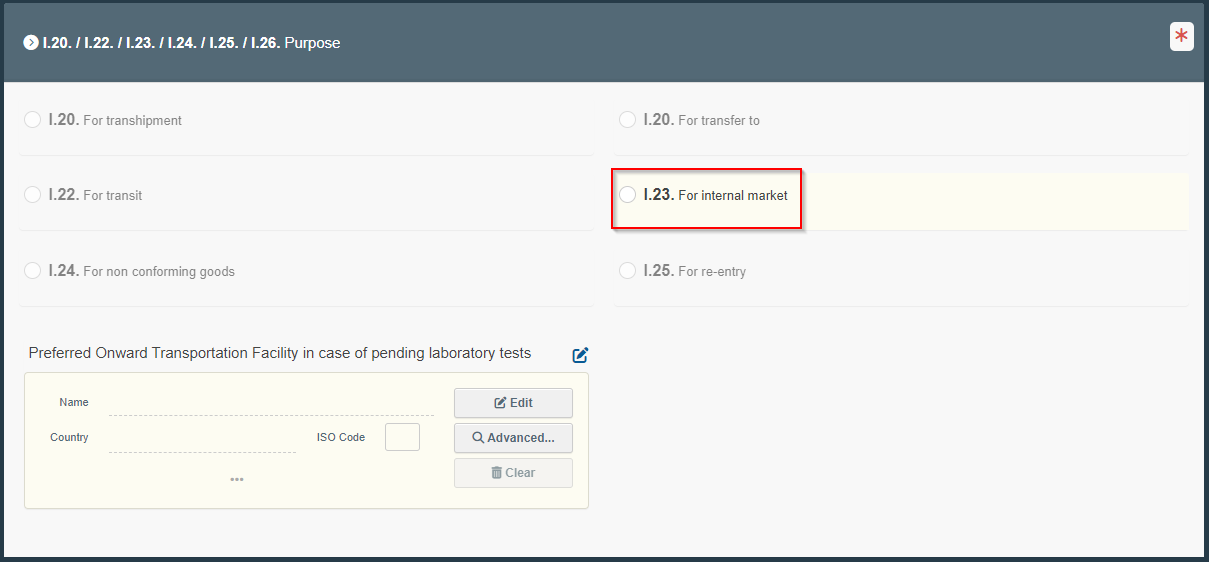
Once such information has been provided, the operator can submit the CHED for decision.
In case of more than one control authority, if the control authority selected in I.4 is not the correct one, the control authority selected can re-assign the CHED changing the authority in Box I.4.
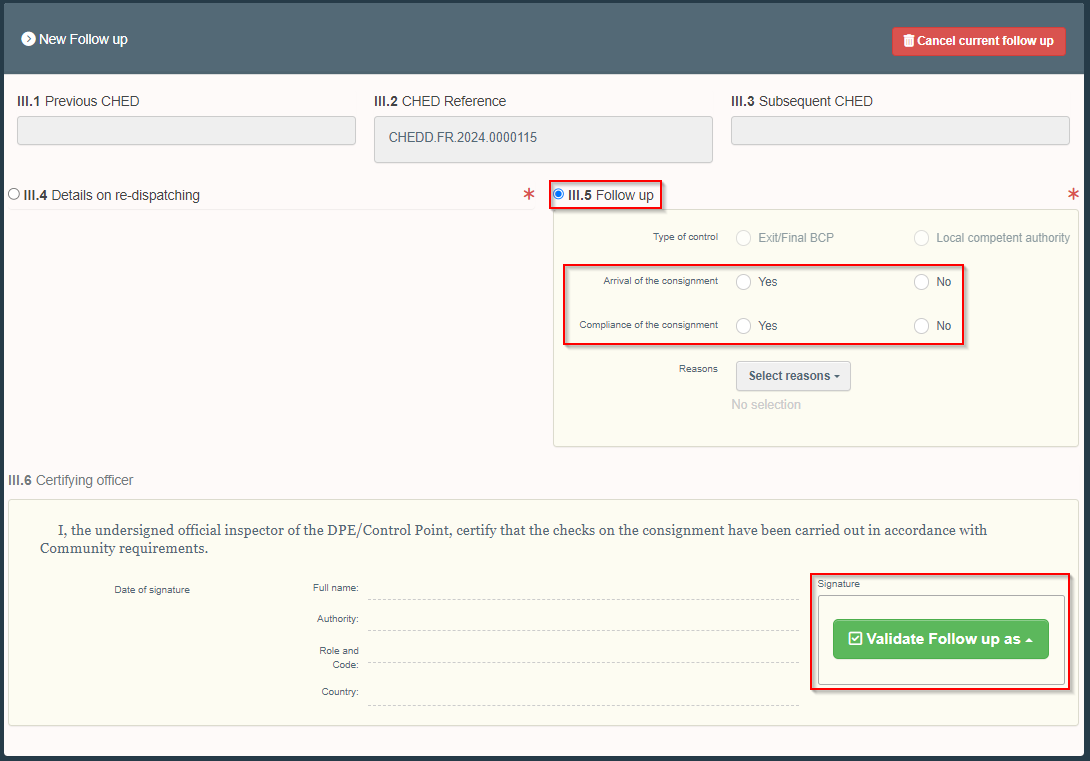
The Control authority of the control point (mentioned in Box I.4) has the possibility to add a Follow-up (Part III) on the first CHED, to confirm the arrival of the consignment at the control point.
After signing the subsequent (i.e., transferred) CHED, a popup appears inviting the user to complete the follow up:


After clicking on confirm, the initial (i.e., authorized for transfer) CHED is opened in a separate tab, directly onto the Follow-up screen:

The follow -up can then be completed and saved via the "Validate Follow-up as" button
 |

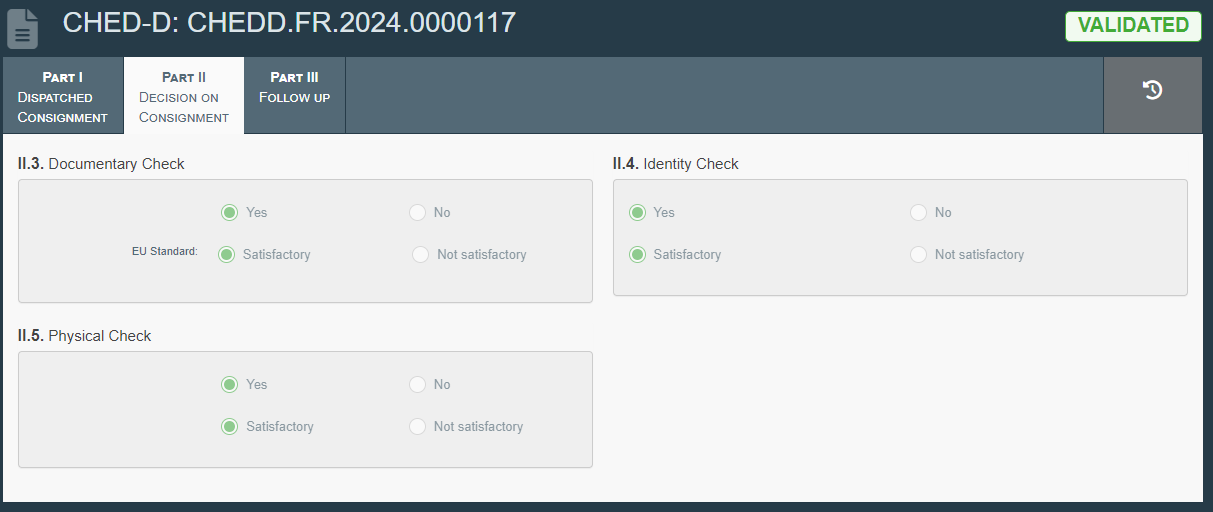
The Control authority of the control point can now finalise Part II of the subsequent CHED by registering the outcome of the identity and physical check. The outcome of Documentary check will be already filled in as the documentary check have been performed at the BCP of entry and registered in the First CHED.
Note that the blue banner of the applied frequency for the physical checks on the commodities (where appropriate) will be displayed in Part II of the subsequent CHED.
 |
In the end, the result will be two CHED-Ds: a first CHED-D with only documentary check registered, and in status authorised for Transfer, and a subsequent CHED, with identity and physical check registered, in status Validated/Rejected/Partially rejected, depending on the outcome of the controls. First and subsequent CHED will be linked, and the link is visible in Part I of both CHEDs, in the box “Link”:
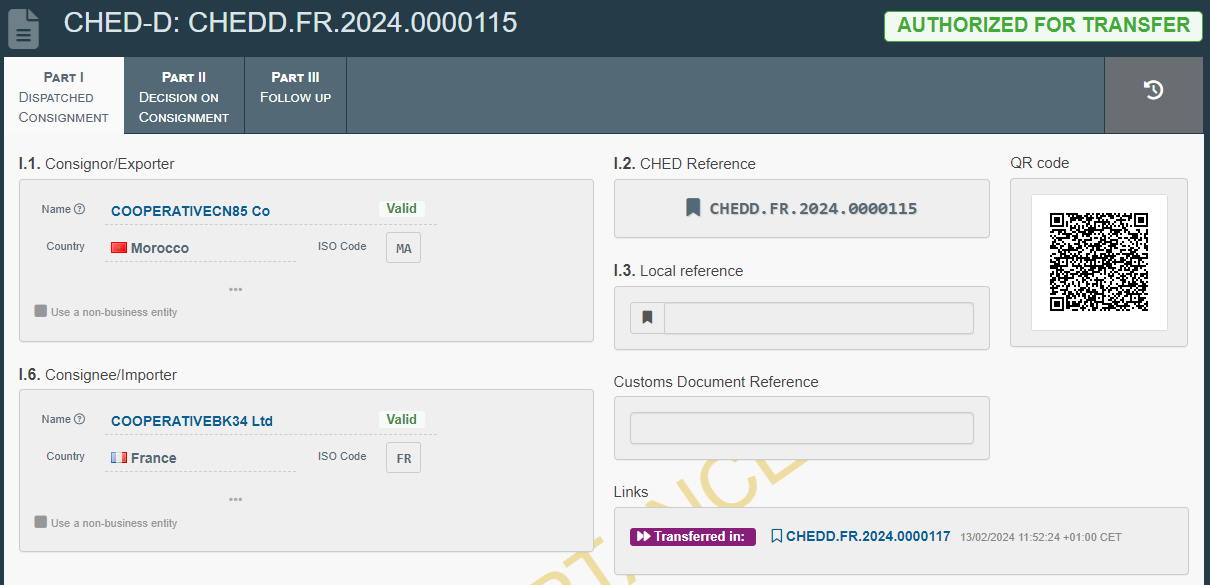 |
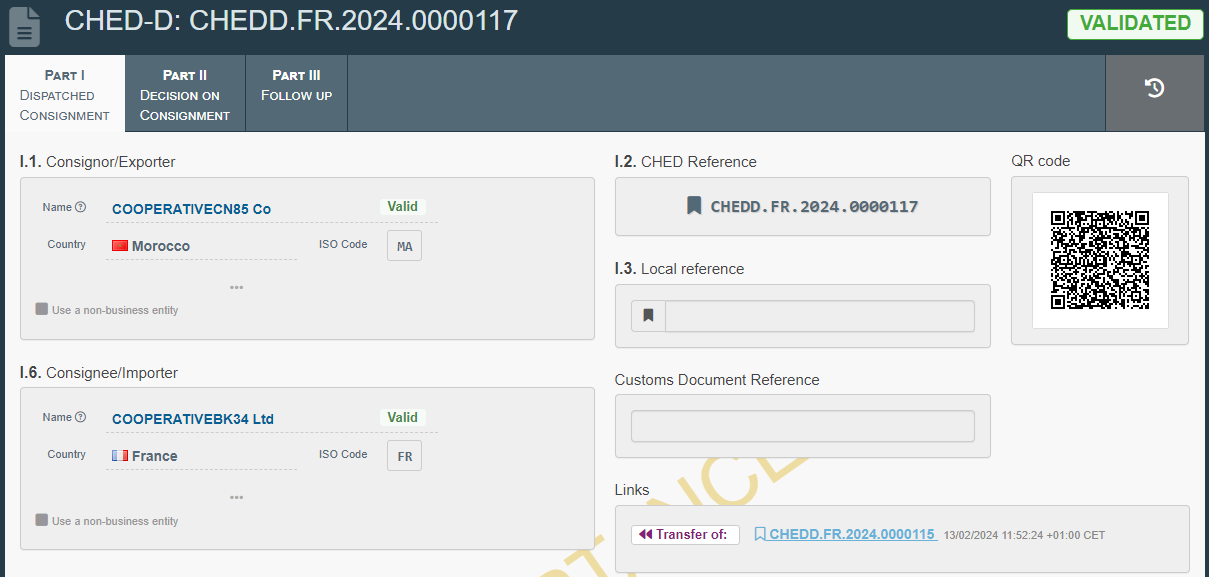 |
Direct Transfer
Users have the option to use another method to create a subsequent CHED as part of the "Transfer" workflow. It can become a useful option in cases where, for example, an RFL other than the one mentioned in the first CHED is in charge of creating the subsequent one but does not have access to the first CHED.
In this case, go to the main page to search for CHEDs (from “Documents” to “CHED”). Here, the user with the right role (for instance, an RFL), will be able to interact with the option "+ Direct Transfer”

Once you click on the corresponding button, a new window will open. Here you will be asked for mandatory information to be able to create the next new CHED starting from the first CHED configured as "authorized for transfer"
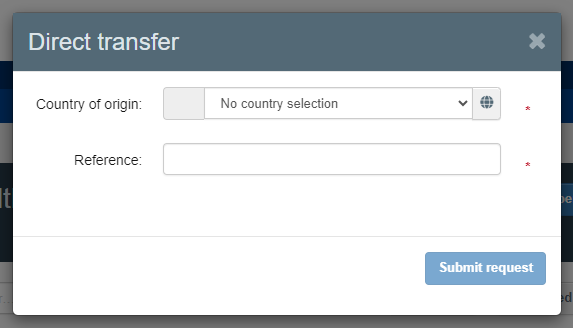
The mandatory information is “Country of Origin”, found in field I.11 of the CHED, and “Reference”, which is the normal CHED reference. Once the information is properly filled in, it will be possible to click on the button “Submit request”.
Once this is done, the system will redirect the user to a new page where it will be possible to complete the subsequent CHED just created.
Split Workflow
Split Function: This allows the commodities in a consignment to be partially released in one or more subsequent CHEDs. As of version 6.12.0, the "Authorised for Split" status has been removed and replaced with the technical status: "Split". On any Validated CHED-D, the Responsible for the consignment has the possibility, from the button Actions, to click on: "Split".

The split action will generate a subsequent CHED, linked to the first Validated one.
The subsequent CHED-D will be pre-filled in with the information of the original certificate, and the RFC will only need to provide the final Place of Destination (box – I.7) and indicate in Box – I.31 Description of the goods the quantity to be released.
The RFC can then Submit for decision to the BCP indicated in the first CHED, which is the authority that will Validate the subsequent CHED. If the net weight to be released exceeds the total net weight in the first CHED, the system will not allow the submission, instead displaying the below error message.

If the net weight to be released is less than or equal to the total net weight in the first CHED, the RFC will be able to Submit for decision and wait for the finalisation of the CHED from the BCP.
There can be many split actions, until the maximum total net weight of the first CHED is reached. All subsequent CHEDs will be linked to the original as seen below.
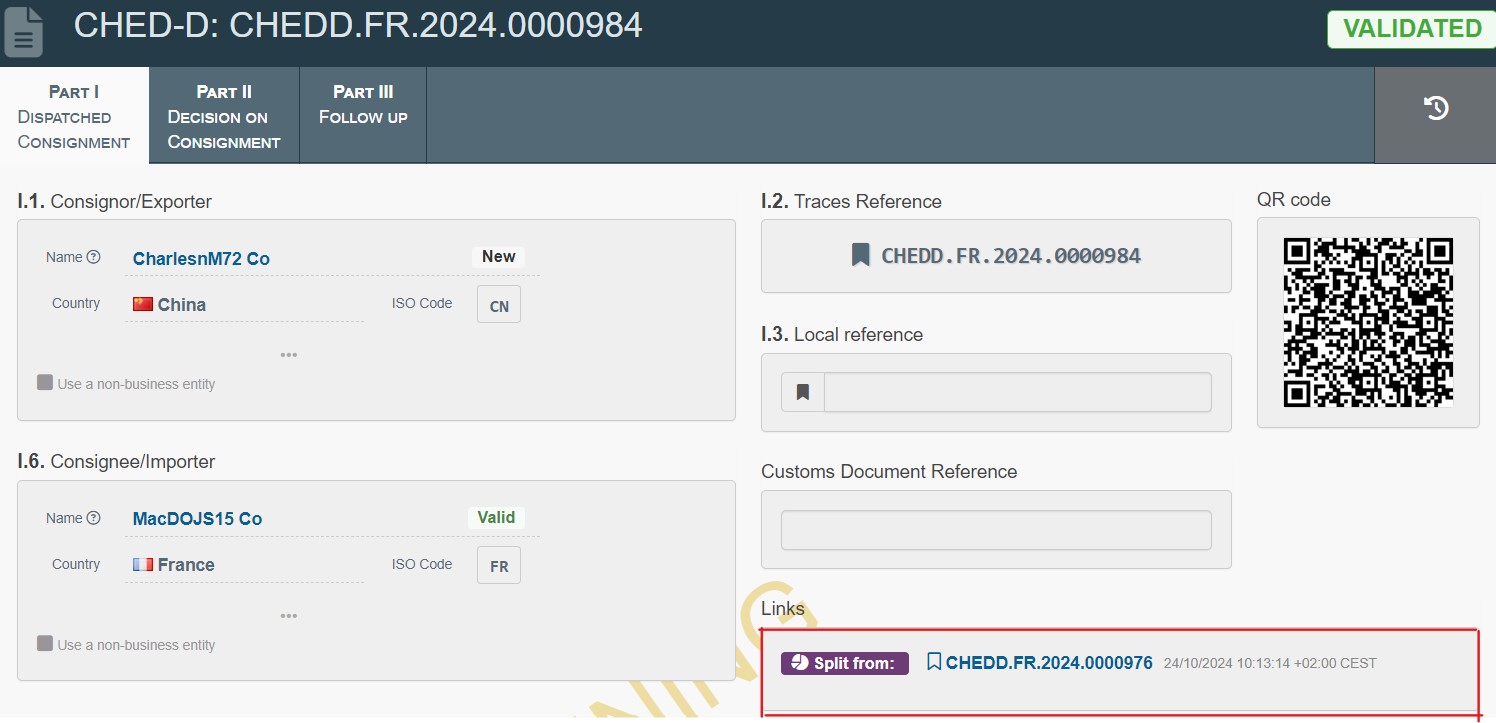
A CHED in "Split" status cannot be cancelled, deleted or replaced; nor can it be used as a supporting document for customs clearance (change to CSW-CERTEX)
Linking a COI to a CHED-D
Caution
For organic and in-conversion products subject to organic checks at border control posts, if the operator intends to release the products in the consignment covered by the CHED on the EU market as organic or in-conversion products it is mandatory to insert the product type ‘organic’ in the CHED in TRACES (see below) and to link a COI to the CHED.
To carry out the COI - CHED-D linking, you must select the product type “organic” inside a commodity box of the CHED:

When this product type has been selected, it becomes mandatory to link a COI to the CHED inside the accompanying documents. Click on the option “Add certificate reference” and select the COI that should be linked to the CHED:
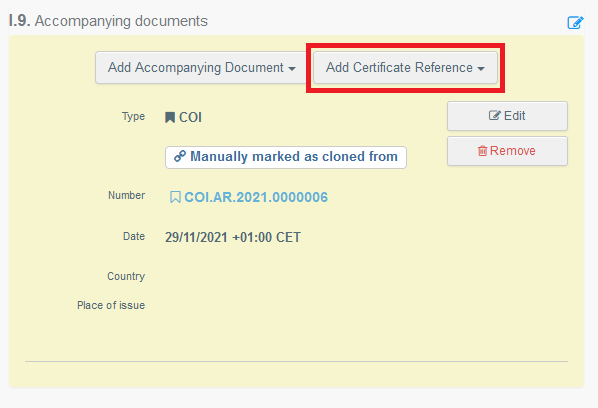
Note
In cases where the RFL is not indicated in the COI, it will not be possible for the RFL to successfully add the COI in box – I.9 of the CHED. In such cases, the RFL user is advised to use the “Link to CHED” function explained in page 37-38 of this manual.
If a CHED and a COI are linked, the link automatically appears in the “Links” box below the reference number of a COI:
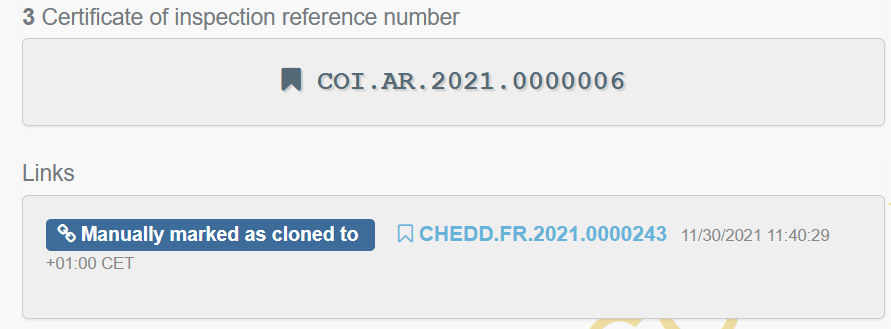
Caution
The rule above does NOT apply to products exempted from organic checks at border control posts (that is to say, those for which only a point of release for free circulation can be selected in box – 10 of the COI) and this even in the case where by virtue of national law only it is required that those goods be checked at border control posts registered in TRACES as points of release for free circulation a be accompanied by an entry document in the same format as the CHED.
Note
If the product type “organic” has been selected in the description of the consignment. A box for “other checks become available in Part II of the document. It is mandatory to tick the box next to “I confirm that I have consulted and verified outcome of related official controls on COI.XX.YYYY.ZZZZZZZ”. Otherwise, it will not be possible to sign the CHED.
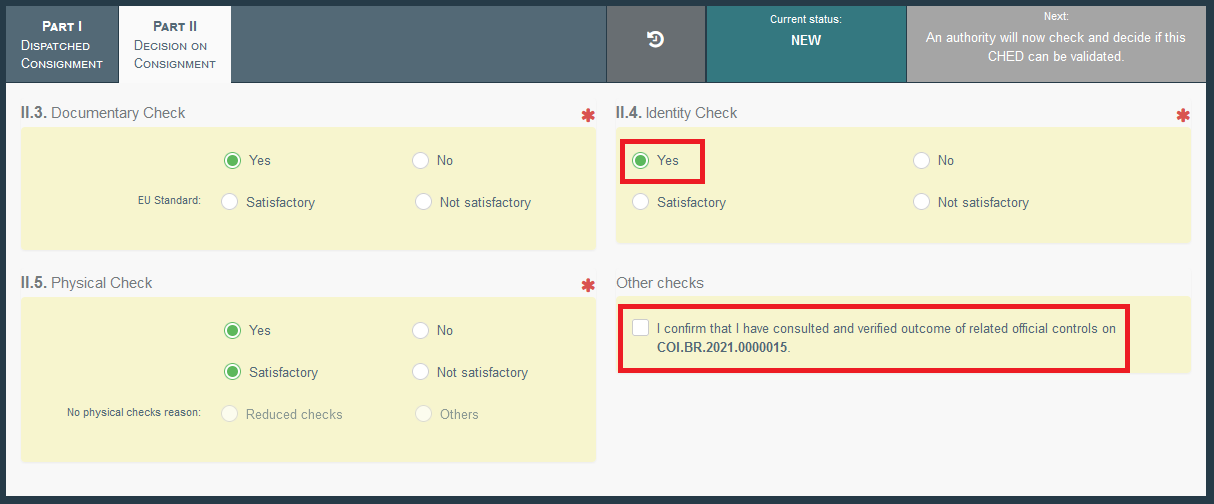
A responsible for the load also has the possibility to link a COI to a CHED, even if the operator is not mentioned in the COI.
Through the menu go to Documents > COI and click on “Link to CHED”:

In the window that opens indicate all the relevant information and click on “Link to CHED” to connect the two documents:
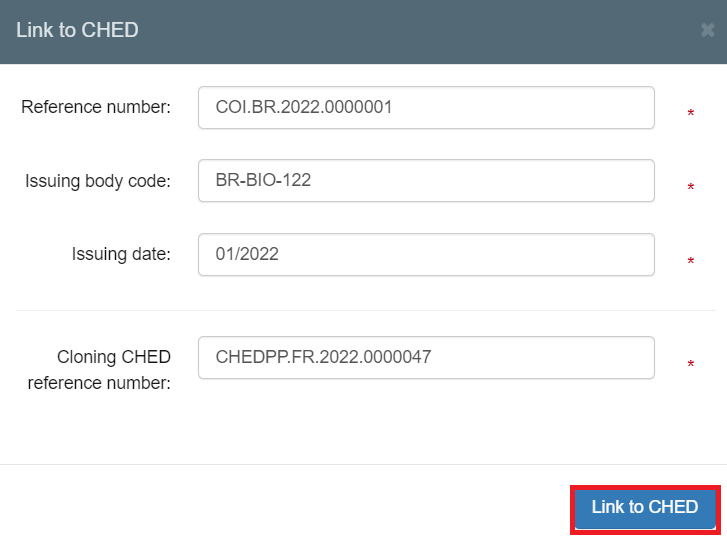
This will link the two indicated documents.