PART I
Details of dispatched consignment – As EO/LAU/CCA
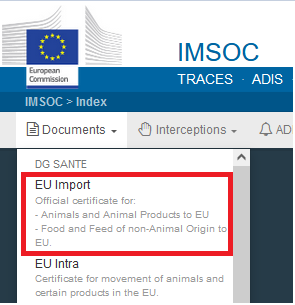
On the homepage, click on “Documents” and then on “EU Import”.
Click on the green button located on the top-right hand side of the window entitled “+New EU Import”.

You have 2 options to select the commodity:
Select it from the list of CN codes by clicking on “+” next to each line (example: 03011100).
Type the name or the CN code of the species (example: tuna/0301) in the search bar. Select the commodity code from the list.
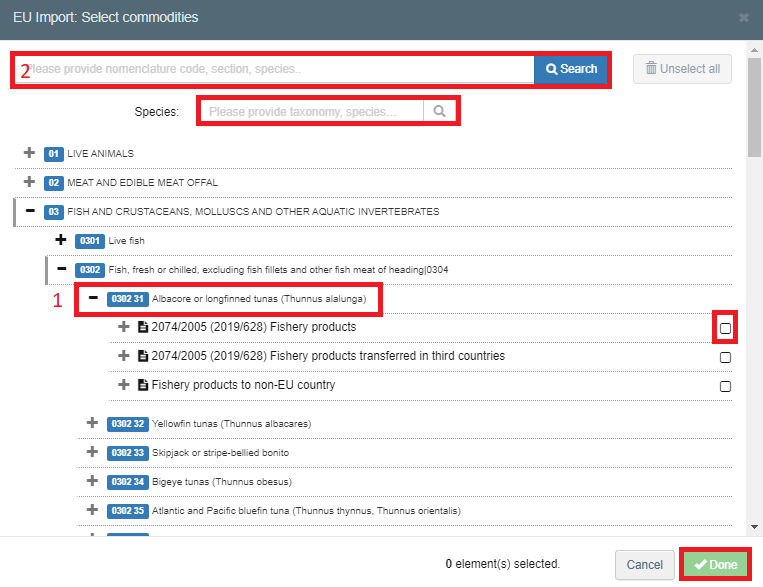
Click on “Done”.
Note
Different commodity codes can be selected simultaneously.
You can still delete, add or modify the commodity details in the document, box – I.29.
Tip
Use the Shortcuts tool on the right-hand side of the certificate in order to navigate easily between the boxes.

Note
All of the boxes marked with a red asterisk are mandatory.
Complete part I of IMPORT
Box – I.1 Consignor/Exporter
To fill in this box, it is possible to:
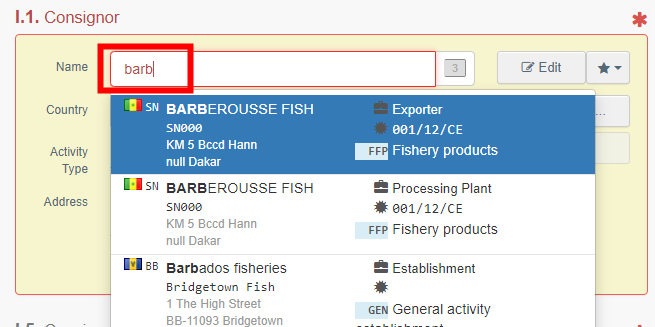
Start typing the name of the consignor and select a company from the drop-down list that pops out.
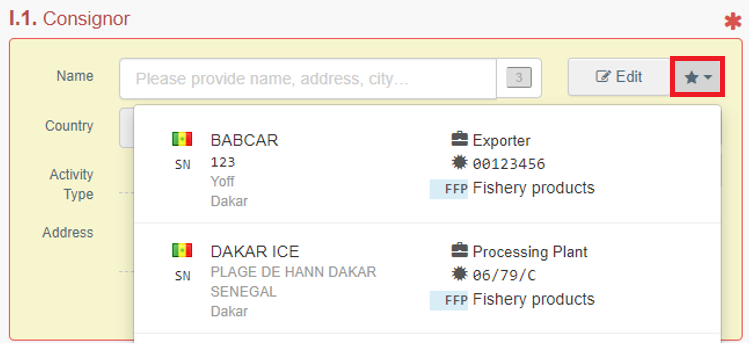
Select a company from the “Favorite operators” list, by clicking on the grey star on the right. To register an operator in your “Favorites”, run an advanced search, find the correct option and tick the star on the left side of the name.
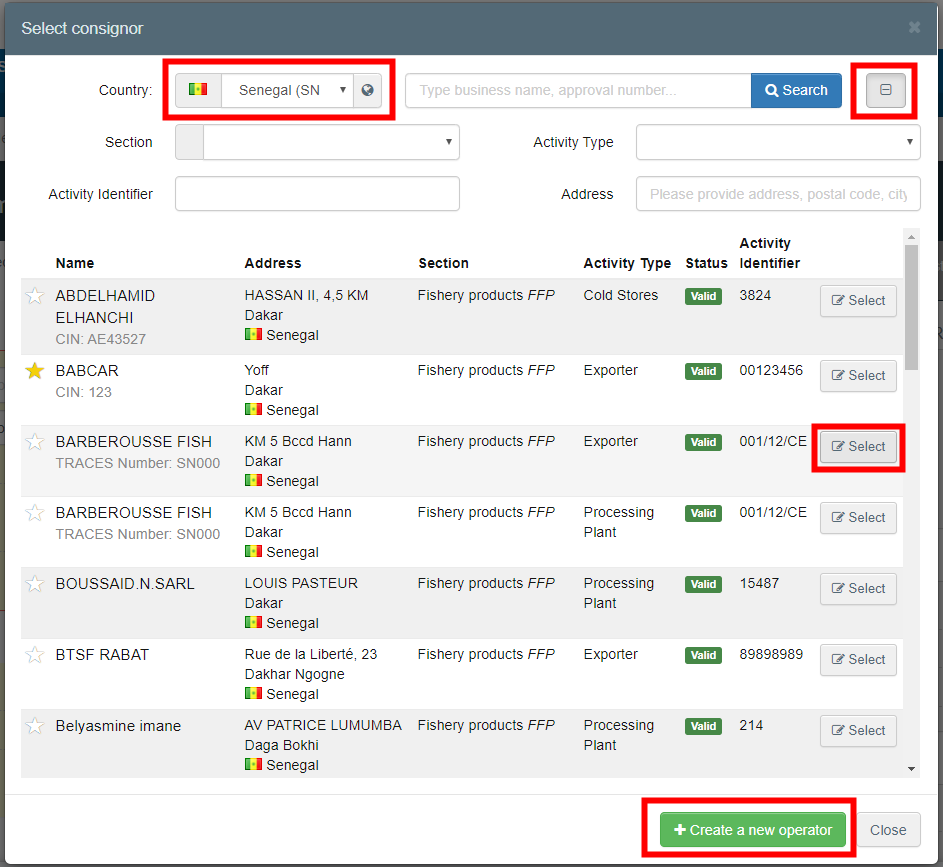
Run an advanced search by clicking on the “Advanced…” button and add some filters by clicking on the “+” button on the right. Once the correct match is selected, the “Name”, “Country” and “ISO Code” of the company are automatically completed.
Note
If the operator is not present in the system, you can create a new one by clicking on “+ Create a new Operator”.
This button will only appear once you did an advanced search in order to avoid as much as possible duplicates in the system.
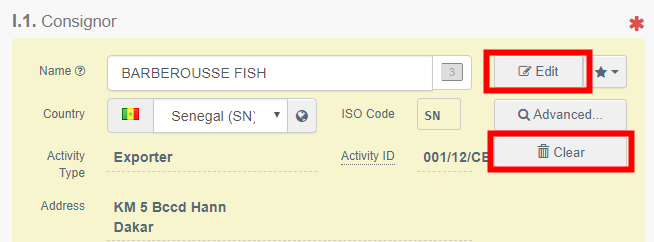
It is also possible to click on “Edit” to modify the content of the box or to clear it by clicking on the “Clear” button and select another consignor.
Tip
You can see the details of the selected operator by clicking on the three dots:

Box – I.2 Certificate reference
It is possible to add a local reference number to the IMPORT. This box is optional.
Box – I.2.a TRACES reference
The IMPORT reference number will be automatically allocated by the system once you save as draft and/or once you submit the IMPORT.
Box – I.3/I.4 Central/Local competent authority
These boxes will be automatically populated by the system once you fill the box – I.11 Place of dispatch.
Links
This box will be filled only in some cases. For example, if the IMPORT has been replaced, the link to the replaced IMPORT will be indicated in this box.
Box – I.5 Consignee
To fill in this box, follow one of the procedures described for box – I.1.
Tip
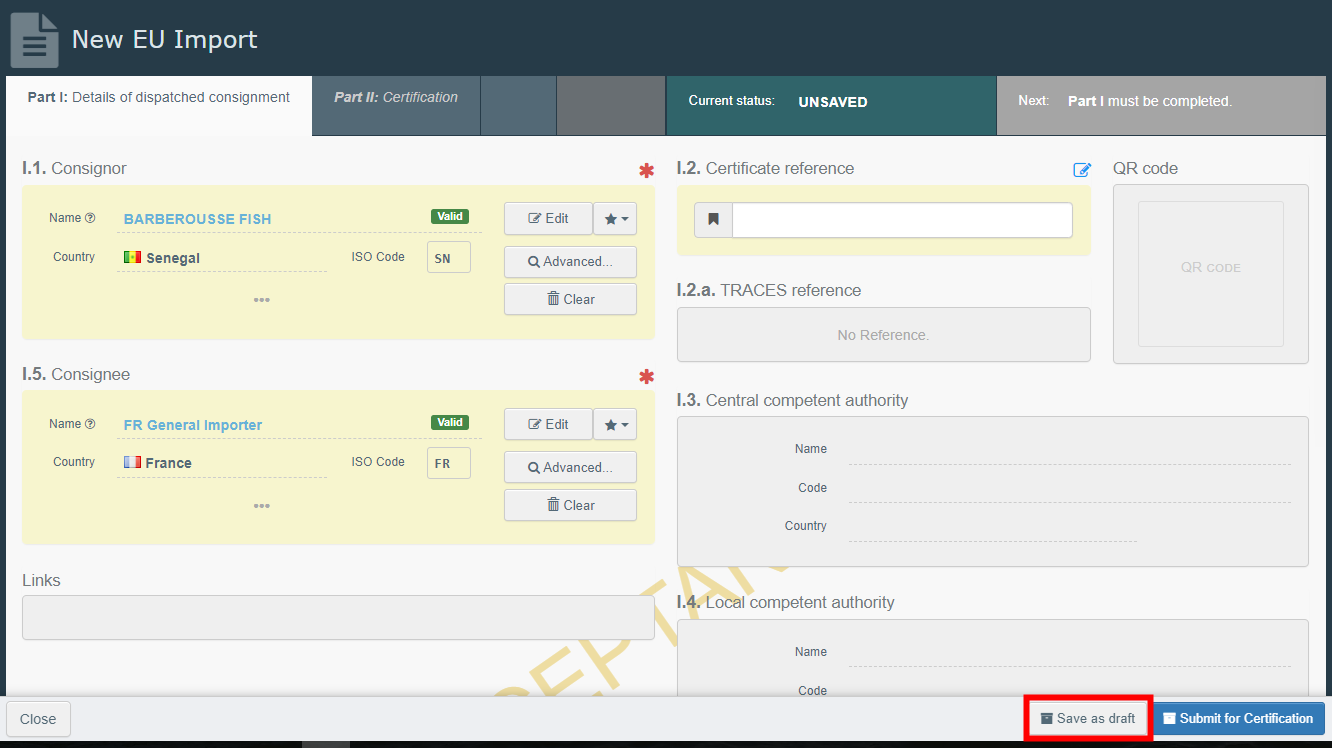
After completing the boxes – I.1 and I.5, you can already “Save as Draft” the Part I of the IMPORT and complete it later.
Box – I.6 Responsible for the consignment in EU
If you know the responsible for the consignment in the EU, then indicate it in this box following one of the procedures described for box – I.1.
Box – I.7/I.8 Country/Region of origin
These boxes will be automatically populated once you fill the box – I.25 Identification of the commodity > Manufacturing plant.
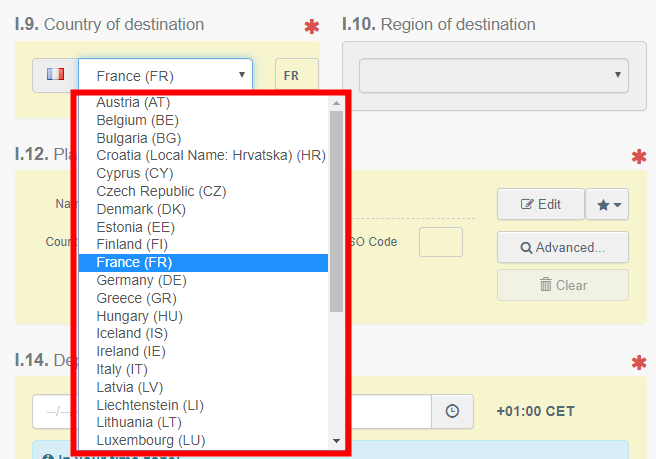
Box – I.9 Country of destination
Box – I.10 Region of destination
This box only needs to be filled when the legislation applies.
Box – I.11 Place of dispatch
Indicate here the holding/establishment from which the animals or the products come from.
To fill in this box, follow one of the procedures described for box – I.1.
Box – I.12 Place of destination
Indicate the place where the animals or products are sent for final unloading.
To fill in this box, follow one of the procedures described for box – I.1.
Box – I.13 Place of loading
Indicate the place where the animals are loaded or the final place where the products are to be loaded in the means of transport for the journey to the EU.
To fill in this box, follow one of the procedures described for box – I.1.
Box – I.14 Date and time of departure
In this box, indicate the date when the means of transport starts (for products) or the date and time at which the animals are scheduled to leave in their means of transport (for animal).
Click on the small calendar icon to choose the date and click on the box to select the exact time (in hours and minutes).

Tip
By clicking the small clock icon, you will set the time to the current date and time.
Date of arrival
Indicate the estimated date and time of arrival. This box is optional.
Transportation duration
This box will be automatically filled once the boxes – I.14 Date and time of departure and Date of arrival have been filled.
Box – I.15 Means of transport
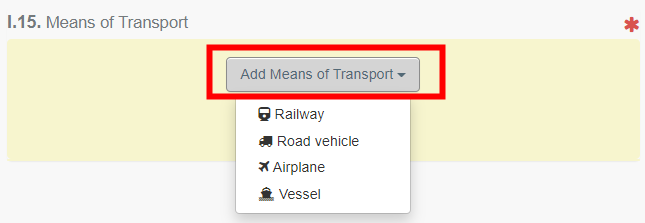
Click on “Add means of transport” to select the means of transport by which the consignment arrives at the BCP. You have the choice between “Rail”, “Road vehicle”, “Airplane” or “Vessel”.
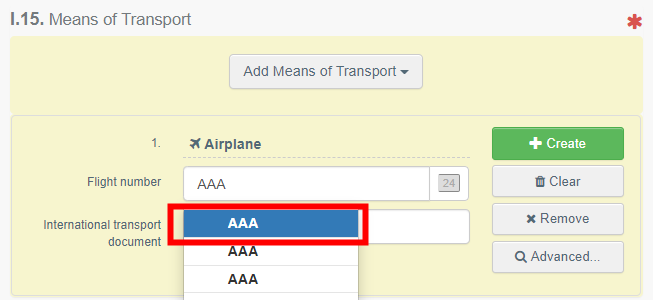
Complete the requested fields. If the means of transport already exists in the system, it will appear in the drop-down list while typing. Select it.
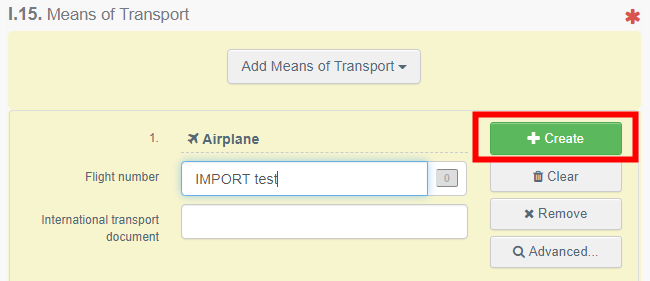
If it does not exist yet, complete the fields and click on the green button “+ Create”.
Note
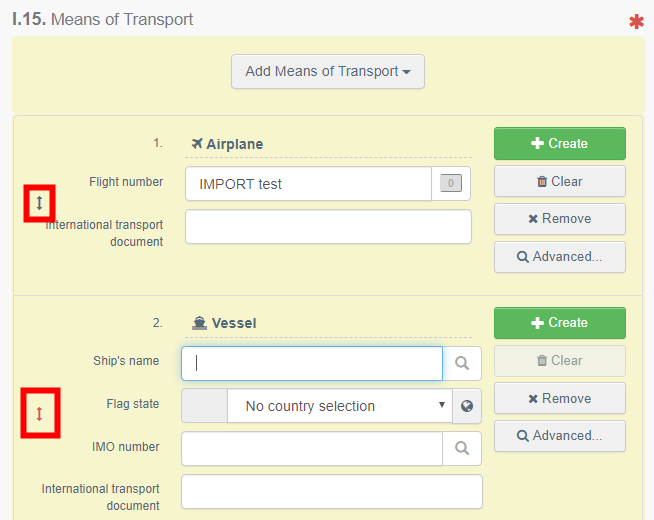
You can add several means of transport and order them by dragging the item with the double sense arrows on the left.
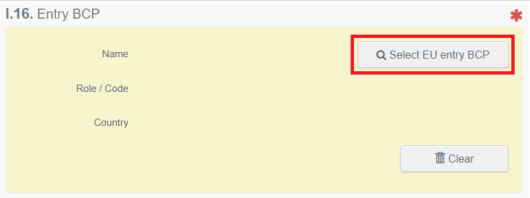
Box – I.16 Entry BCP in the EU
In order to add an entry BCP, click on “Select EU entry BCP”.
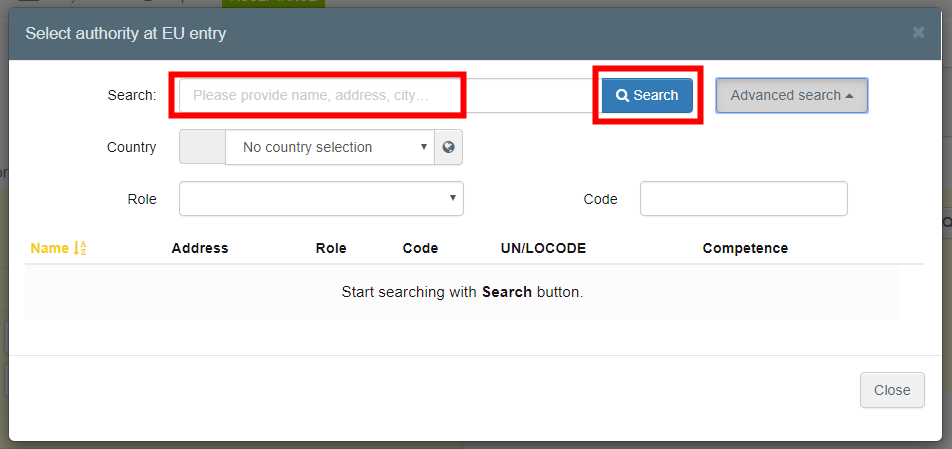
Type the name of the entry BCP and click on “search” or proceed to an advanced search.
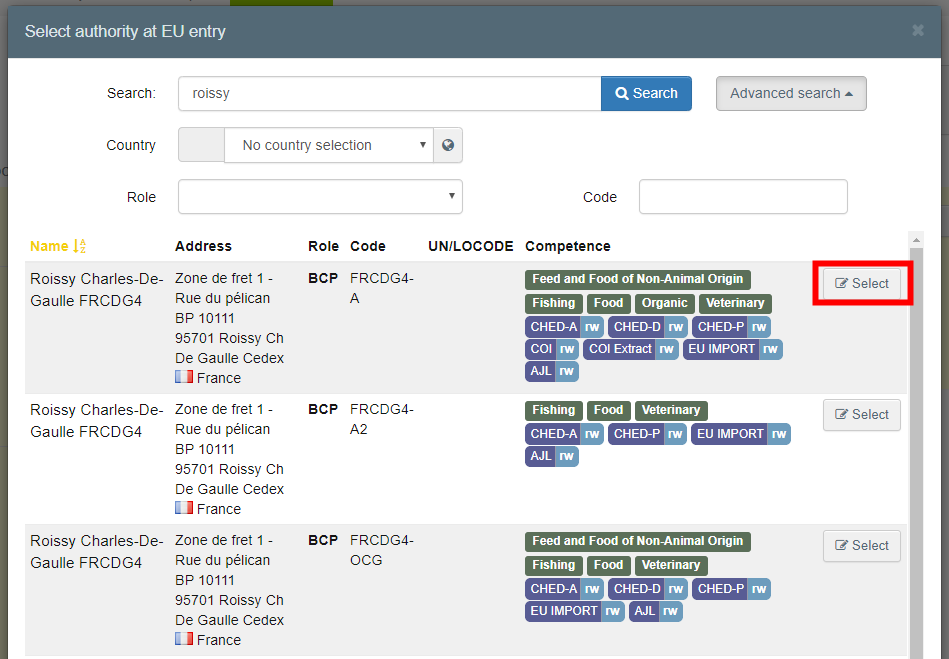
Click on “Select”.
Box – I.17 Accompanying documents
The purpose of this box is to provide any relevant documents.
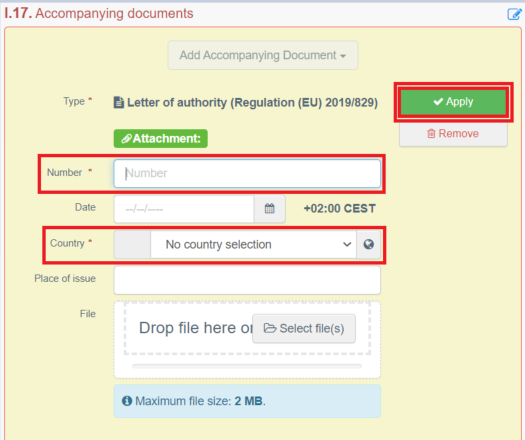
Click on the button “Add Accompanying Document”:
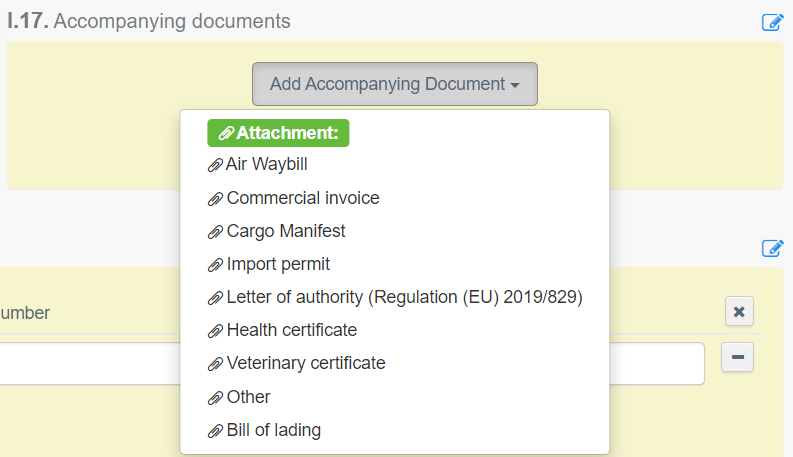
Choose the type of document from the corresponding drop-down list and enter all relevant information, such as “Number”, “Date” and “Country”.
If you wish to upload a file, then click on the “Select file(s)” button. Don’t forget to click on “✓ Apply”.
Box – I.18 Transport conditions
Tick one of the options available. The options may change according to the CN code chosen.

Box – I.19 Container No / Seal No
When applicable, indicate the container number and seal number.
Box – I.20 Certified as
Select the correct option for the intended use of the consignment. The options displayed depend on the CN code selected.

Box – I.21/I.22/I.23 Purpose
Select the purpose of the movement of the animals/products. If necessary, complete the requested information by clicking on “Advanced”.
Box – I.21 “For transit”
When the consignment, coming from a 3rd country, will pass through the EU territory to arrive to its final destination in another 3rd country. (E.g. Senegal – France – Canada)
Choose the 3rd country of destination in the drop-down list.

Box – I.22 “For internal market”
When the consignment is intended to be placed in the European Union market.
Box – I.23 “For re-entry”
When the consignment is rejected in the 3rd country and needs to be resend in the European Union market.
Box – I.27 Description of consignment
The purpose of this box is to complete the mandatory sections depending on the commodity.
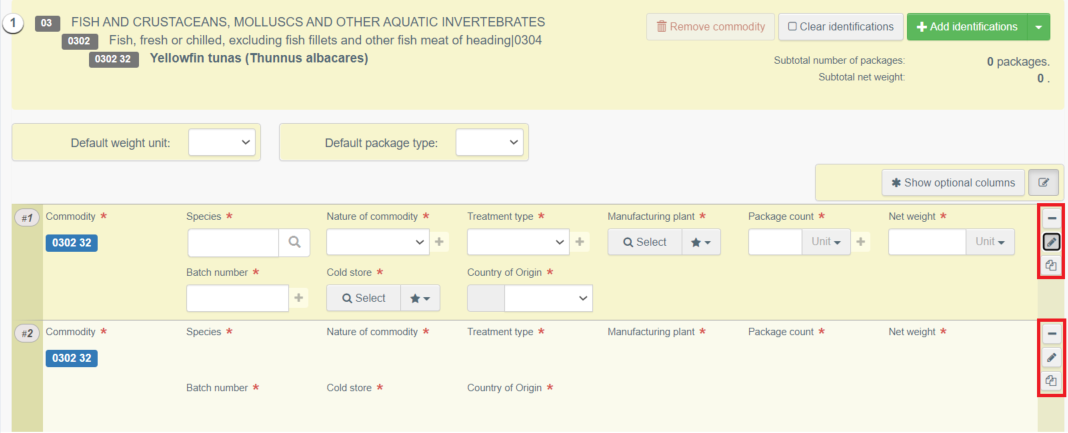
“+ Add new commodity” or “Modify commodities” will allow you to add a CN code or change the CN code selected.

The box “Certification model” is automatically filled depending on the model you selected when choosing the CN code at the beginning of your IMPORT. You can modify the model by clicking on “Change”.

"Remove” will delete the selected commodity from the document.

“Clear identifications” or “+ Add identifications” will affect the lines of commodities included in the document. You can also delete, modify or add rows by clicking on the small icons on the right side of the box.
Tip
You can add 5, 10, 50 or 100 rows at once by clicking on the arrow.
In the box “Commodity”
Type the Species and/or select it in the ones proposed in the drop-down menu.
Select one of the options in the “Nature of commodity” / “Treatment type” box.
To fill in the box “Manufacturing plant”, click on “Select” and follow one of the procedures described for box – I.1. If the manufacturing plant is kept in your favorites, click on the little star button.
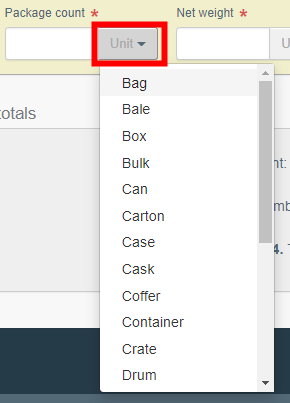
Fill the box “Package count” and “Net weight”. Do not forget to choose the unit by clicking on the grey “Unit” button to choose the correct package/unit:
Select one of the options in the “Batch number” / “Cold Store” / “Country of Origin” boxes.
In the part “Quantity totals”
Fill the box – I.26 Total gross weight and choose the correct unit by clicking on the unit button.
The boxes – I.24 Total number of packages and I.26 Total net weight will be automatically filled according to the rows of the commodity.

Box – Identification of applicant
The box will be automatically filled when you click on “Submit for Certification” on the bottom-right of the window.
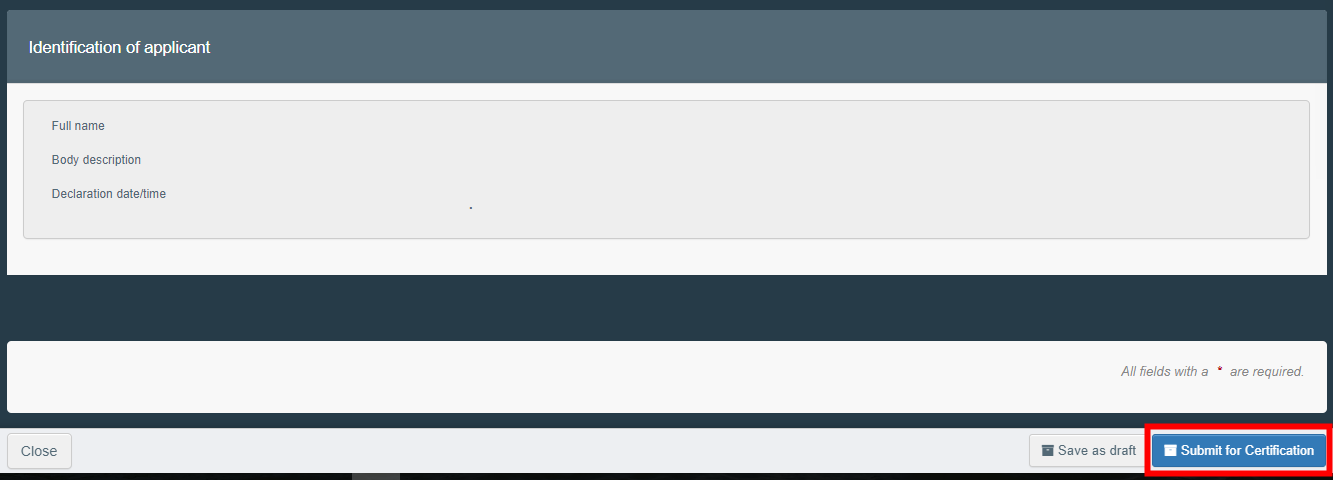
Once the document is submitted, the status will change to “NEW”. The authority has access to the IMPORT to complete Part II and take the decision.
Note
The 3rd country operator can still modify PART I when the IMPORT certificate is still at the submission stage (Status “NEW”). Once the operator has done the modifications, important to not forget to click on “Submit for Certification” once again in order to save the changes.
Error message
If you filled in any of the boxes incorrectly or missed a box, an “Error” message will appear.
Click on the “expand” sign on the right-hand side of the error message to read the message in more detail.
Click on each of the messages to be redirected to the box that requires modification.

Important
Do not forget to Submit for Certification again once you have corrected the boxes.
Other options
At the bottom of the page, you will have the following options:
By clicking on the “More” button you can:

“Delete”: allows you to delete the IMPORT.
“Copy as new”: create a new IMPORT in which most boxes are copied from the original document. The original IMPORT is not altered by this action.
By clicking on the button “Preview PDF”, it will open the document as PDF.
By clicking on “Advanced Print Options”, it will open the language selection and allow you to print the PDF in several languages at the same time.
