PART II – Decision on Consignment
As BCP
As BCP, you can access the CHED-A and modify every information from Part I.
Tip
If you do not want the operator to modify the CHED anymore, you can “Sign as in progress”. From that point onwards, the RFC can no longer modify the data from Part. I.
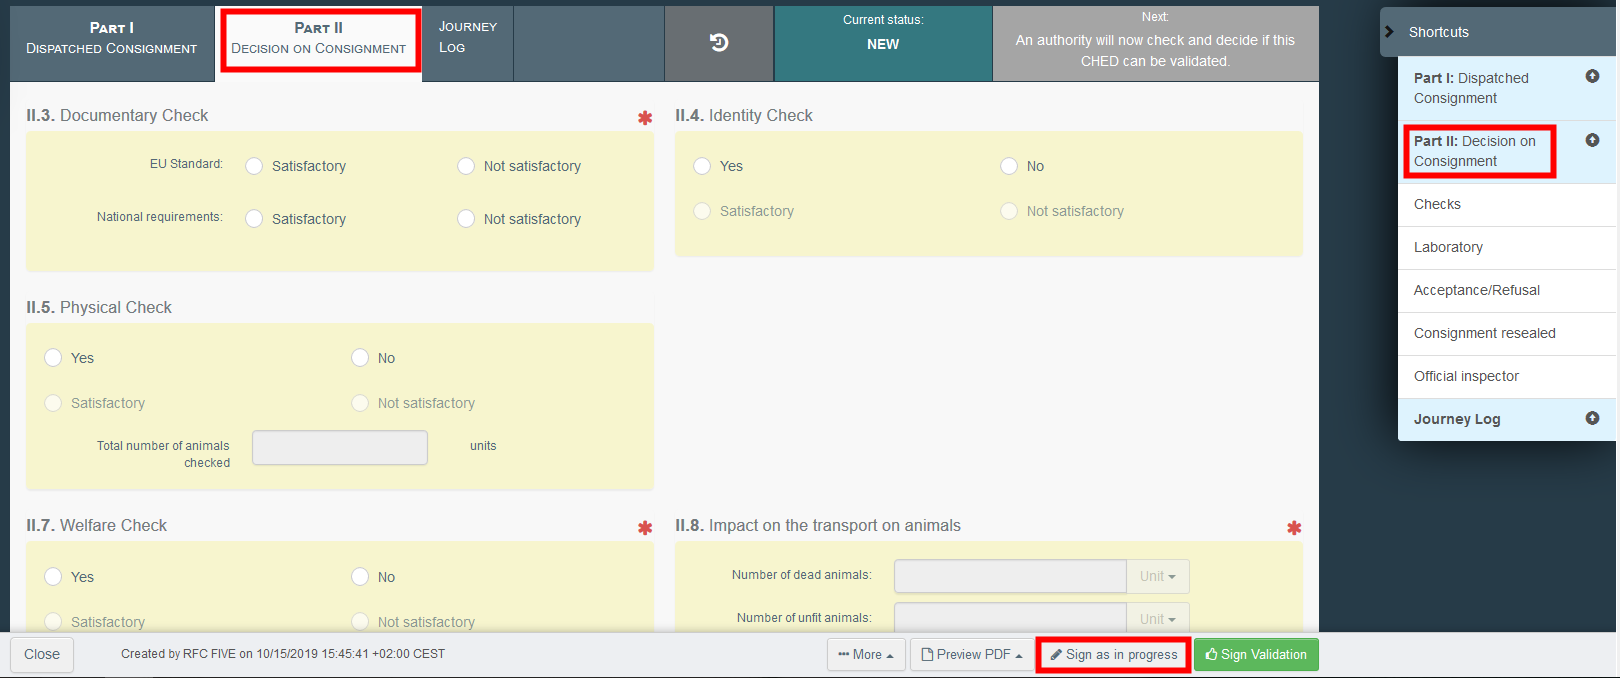
Complete part II of CHED-A
Box – II.3 Documentary Check
Indicate if “Satisfactory”/ “Not satisfactory” depending on the EU Standard.
Box – II.4 Identity Check
Indicate if an identity check was performed. If yes, indicate if it was satisfactory or not.
Box – II.5 Physical Check
Indicate if a physical check was performed. If yes, indicate if it was satisfactory or not and indicate the number of animals checked.
Box – II.7 Welfare Check
Indicate if a welfare check was performed. If yes, indicate if it was satisfactory or not.
Box – II.8 Impact on the transport on animals
This box is only activated when you select “Yes” in the physical checks box.
Complete the boxes with the correct information and choose the correct unit.

Box – II.6 Laboratory Tests
This box is to be completed only if a physical check was performed.
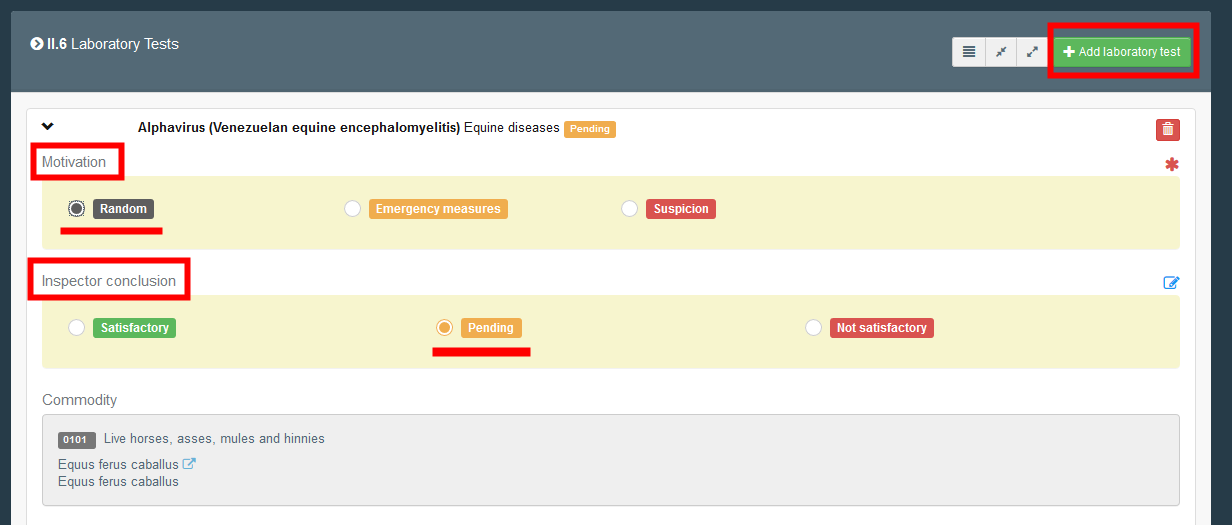
Click on “+ Add laboratory test” to add one or more lab tests.

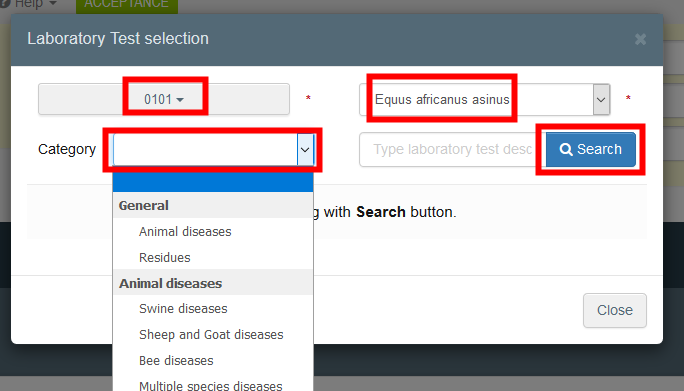
Select the commodity and the species that will be tested and the category of the test, then select the test from the list.
Complete the following information: motivation and inspector conclusion.
You also have the possibility to add a counter-analysis.
Note
If the motivation is ‘Random’, you can sign the CHED-A with the inspector conclusion “pending” and submit the test results later by clicking on “Submit laboratory tests”.
Box – II.9/II.10/II.11/II.12/II.13/II.14/II.15 Conclusion
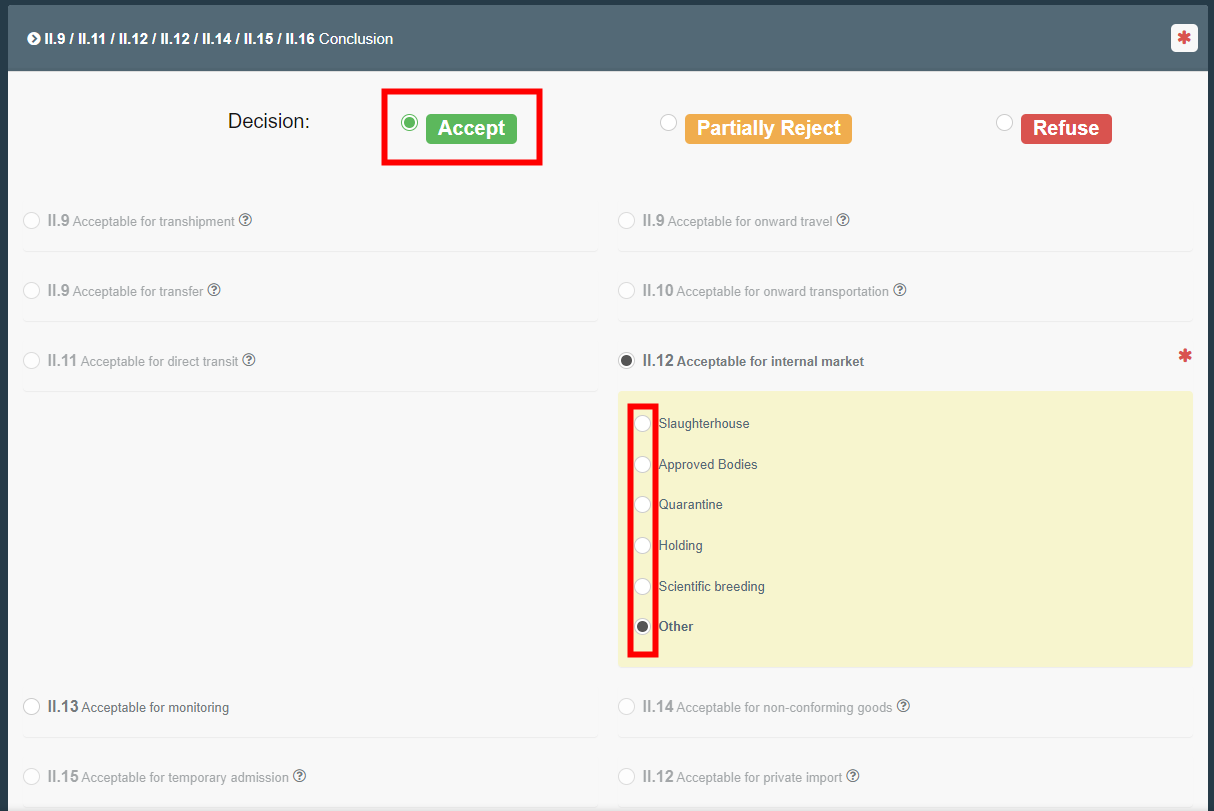
Indicate your decision regarding the consignment and complete the necessary information.
Validation: tick the box “accept” and select one of the options available for the box – II.12
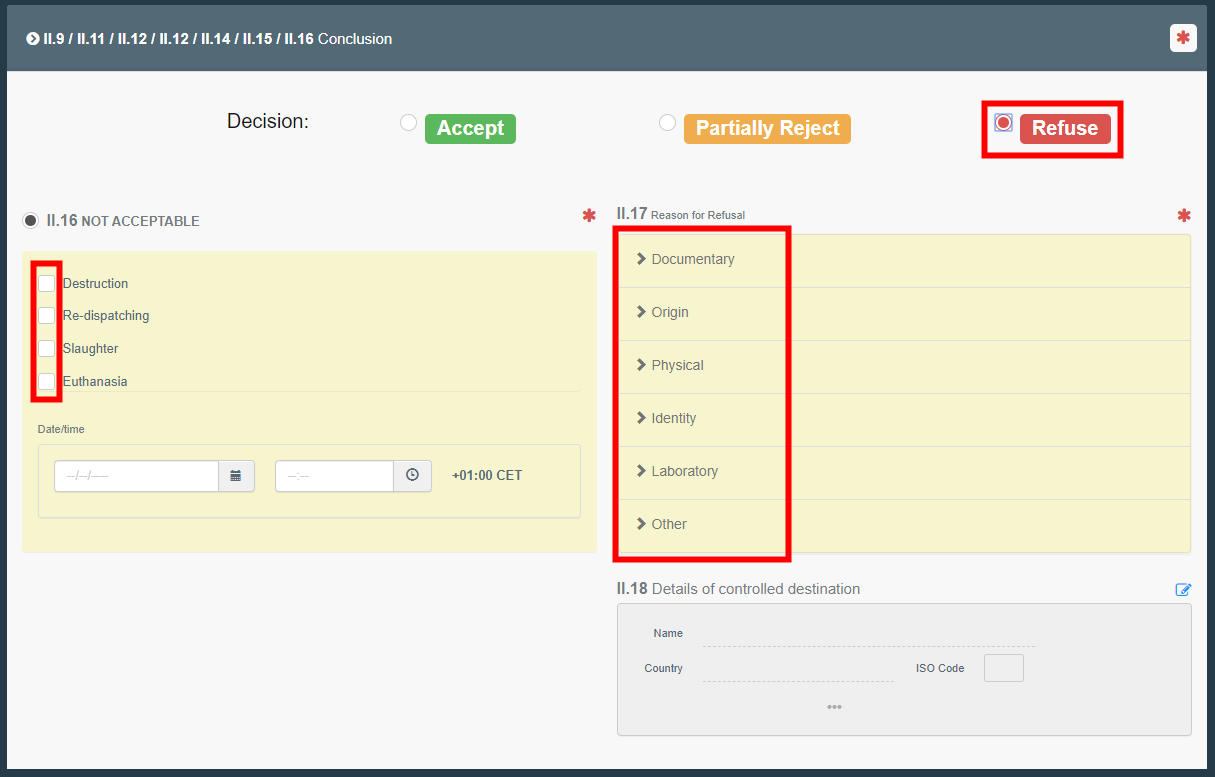
Rejection: tick the box “refuse” and select one of the options available for the boxes – II.16 Not Acceptable and II.17 Reason for Refusal
Box – II.18 Details of controlled destination
When applicable, you should fill in this box with the details of the controlled destination of the consignment.
Partial rejection: tick the box “partially reject” if you want to accept only a part of the consignment

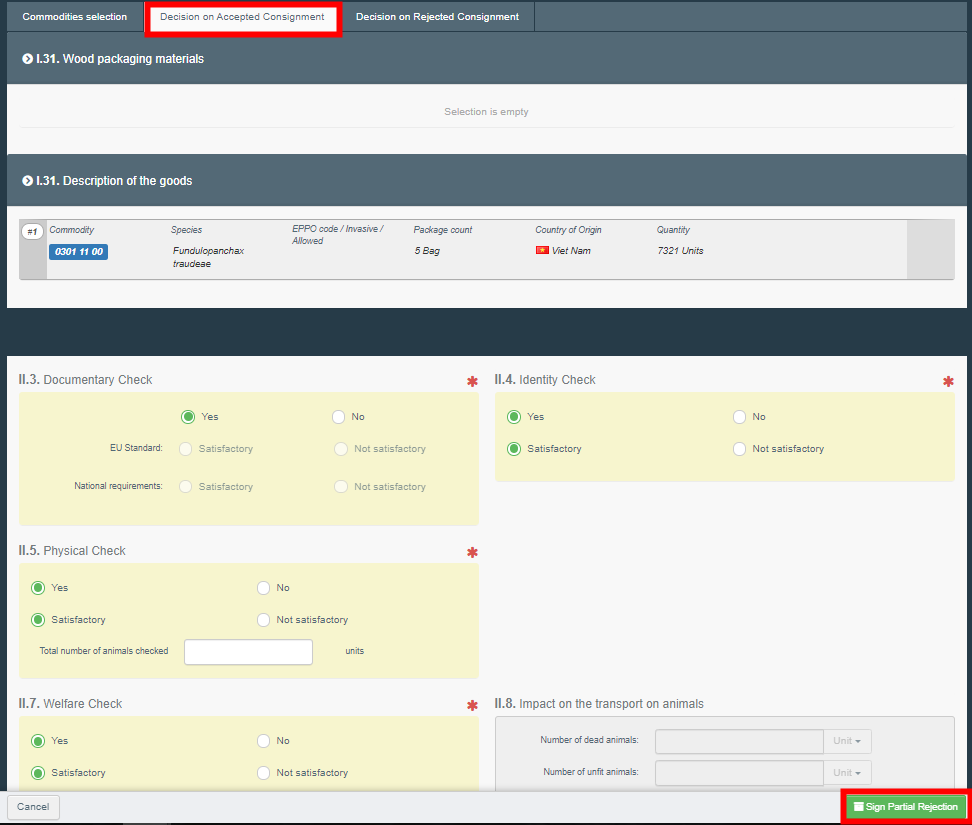
After submitting for partial rejection, you will be redirected in a new tab where you will be able to submit both your decision on the accepted part of the consignment and your decision on the rejected part of the consignment.
In the green button, you have the option to reject or partially reject. If you click in “partially reject”, in the commodity row, you will be asked to select the amount of packages and/or the quantity of units you wish to reject.
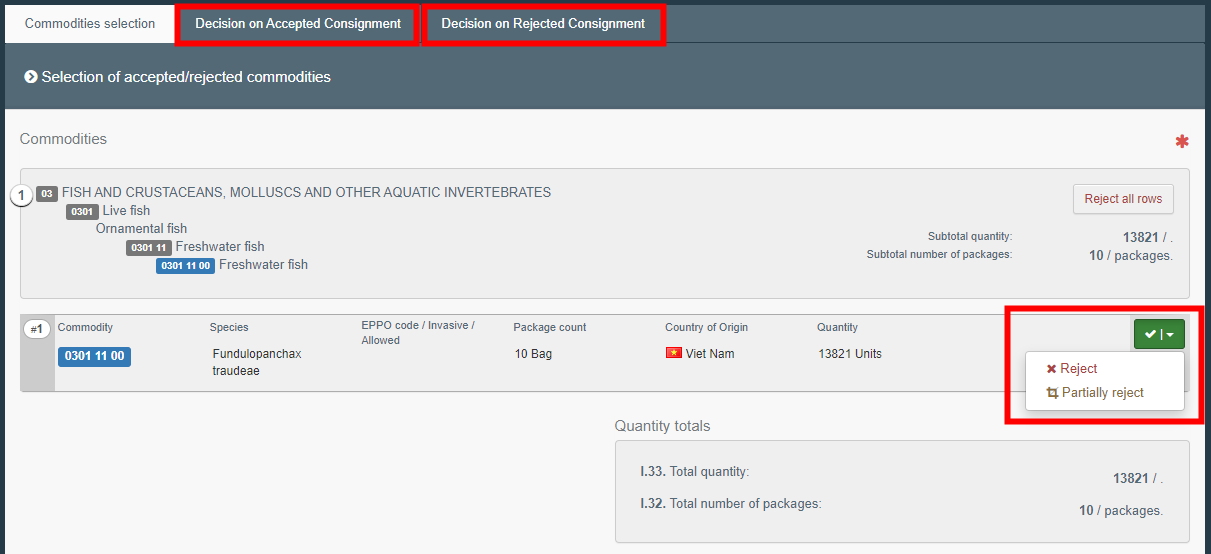

Then, in each tab (decision on accepted/rejected consignment), you will be able to take the decision:

You can see that the consignment has been partially rejected in the menu when there is a little blue icon next to the CHED number. By clicking on this icon, you will see the links to both subsequent CHED: the validated consignment and the rejected one:

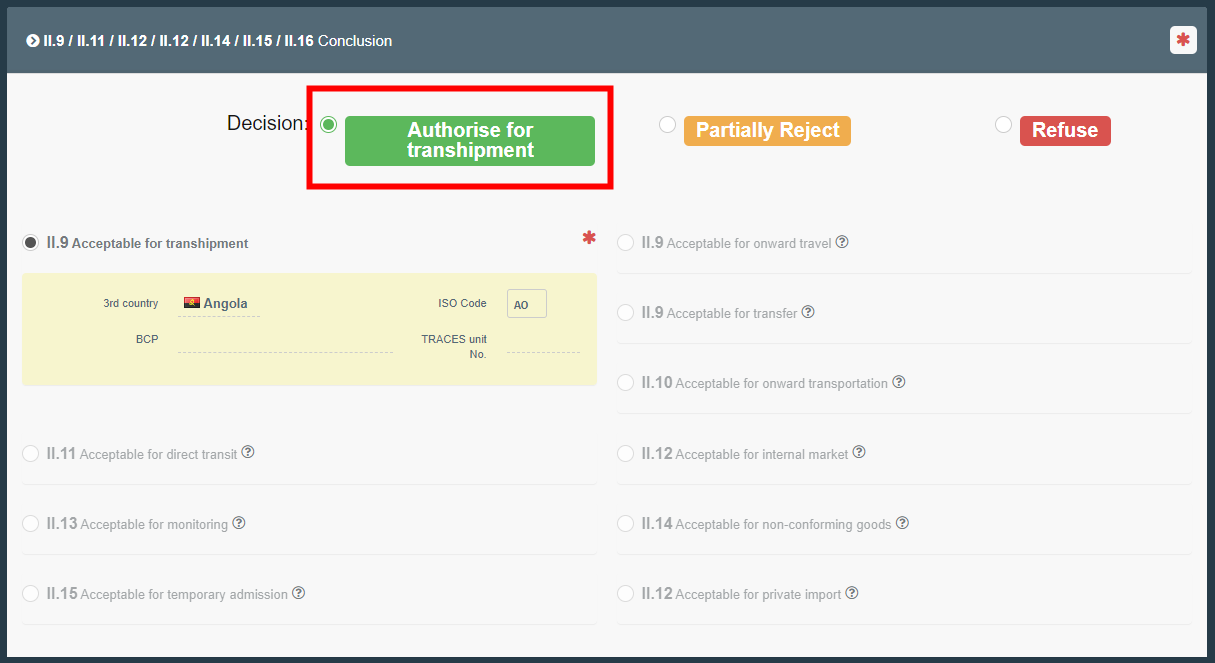
Authorise for transhipment: When transhipment has been ticked in the box – I.20 in the PART I, this option will appear automatically completed in PART II and the destination third country or the BCP will be automatically filled in the box – II.9.
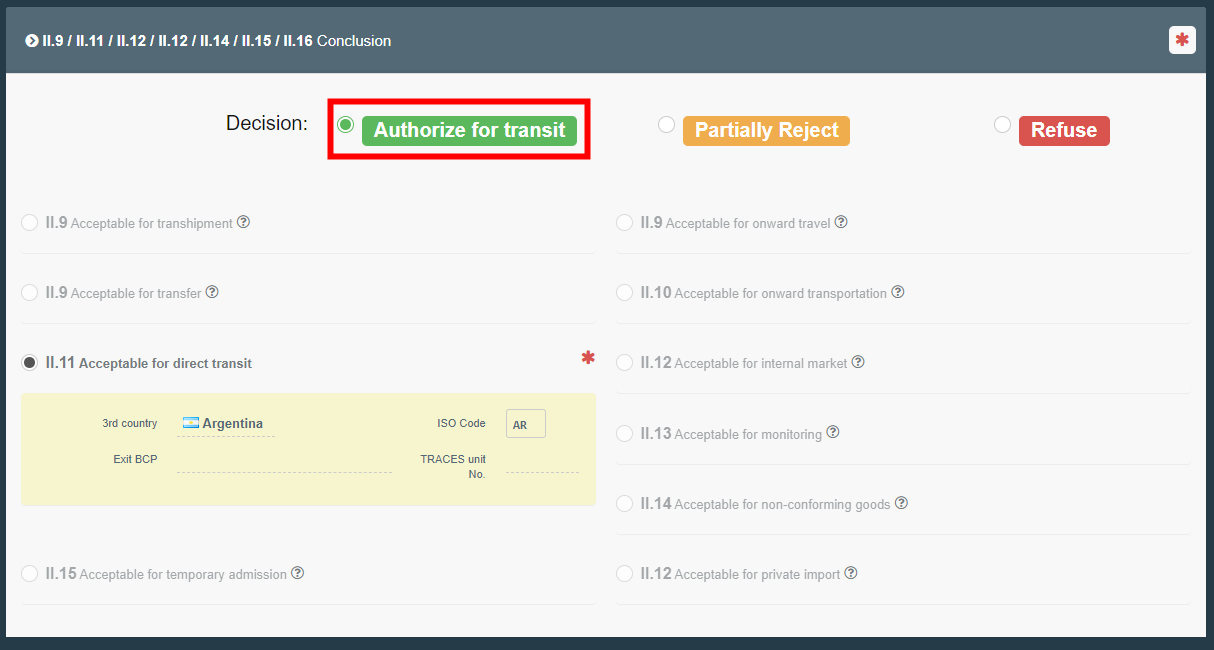
Authorise for transit: when direct transit has been ticked in the box – I.22 PART I, this option will appear automatically completed in PART II and the destination third country will be automatically filled in the box – II.9.
Authorize for onward travel: when Onward travel has been ticked in the box – I.20 in PART I and the destination third country has been chosen in the list. This option will appear automatically completed in PART II and the destination third country or the BCP will be automatically filled in the box – II.9

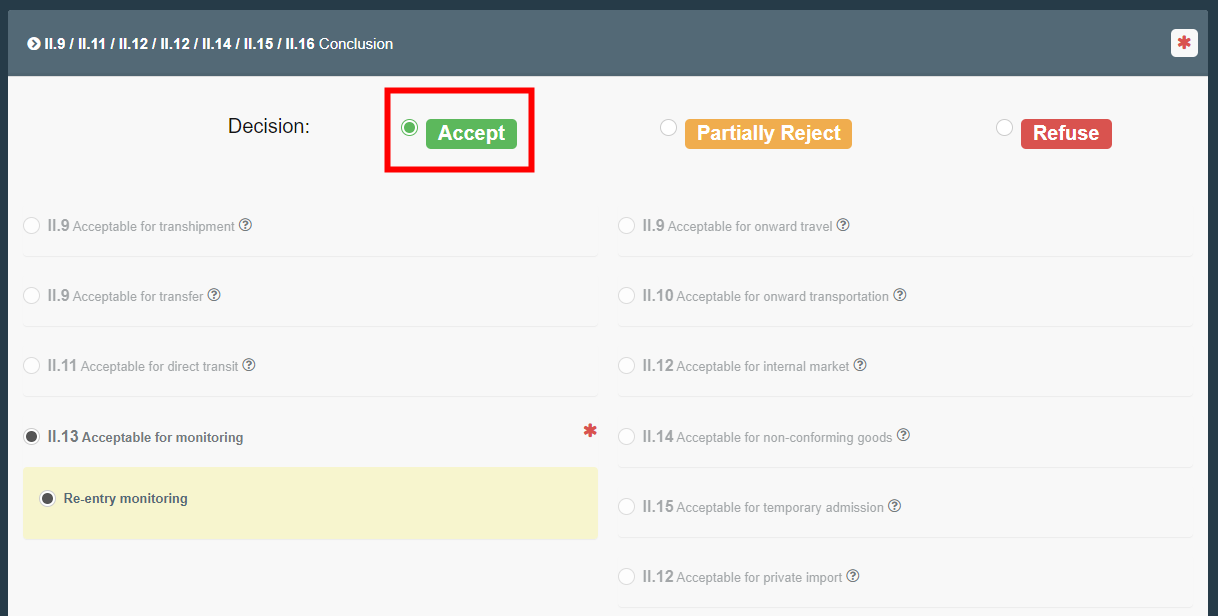
Acceptable for re-entry: when re-entry has been ticked in the box – I.25 in PART I, the options acceptable for monitoring and re-entry monitoring are automatically selected in box – II.13 of PART II.
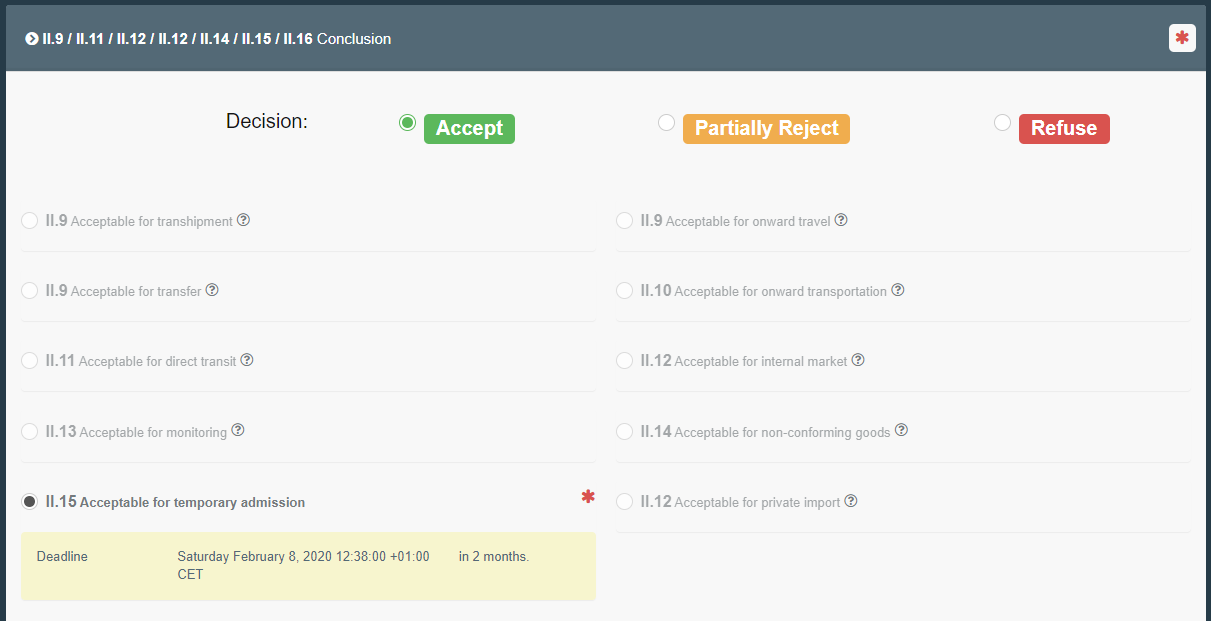
Acceptable for temporary admission: when the purpose for temporary admission has been ticked in box – I.26 in PART I, the box – II.15 Acceptable for temporary admission is automatically selected in box – II.15 of PART II.
Box – II.21 Certifying officer
This is where the competent authority of the BCP signs the Validation/Rejection of the consignment. You can also sign by clicking on the button at the bottom of the page.

If you filled all the boxes and fields correctly, the current status is one of the following options:
Validated
Rejected
Partially rejected
Authorised for transhipment
Authorised for onward travel
Authorised for transit.
You have successfully completed PART II of the CHED-A!
Other options
By clicking on “More” at the bottom of the page you can:
Cancel document.
Replace: create a replacement of the CHED-A in case some information need to be changed after the validation.
The first CHED will then have the status “Replaced” and the new CHED-A will have the status “Valid”. Both will be linked and this link will appear on the printed document as well.
Copy as new: this will create a new CHED-A that will be pre-filled with the ninformation of the current document. In that case, the two CHED-A are not linked.
By clicking on “Preview PDF” button you can:
Preview the PDF certificate.
Preview the PDF certificate and the Journey Log.
In the “Advanced Print Options” you can choose the languages in which you want the document to be printed. You can choose more than one language.