
This instructions refer to a version of submission using pdf forms which is no longer in use. Please, click here for the current version, and update your bookmarks with the correct URL.
Table of Contents
- Introduction
- Steps 1 and 2 Logging in and Selecting a Topic
- Step 3 Create a Draft Proposal
- Step 4 Manage Your Related Parties and Edit Contact Details
- Step 5 Edit and Complete Proposal
- Step 6: The 'Proposal Submitted' Page
- Minimum Technical Requirements
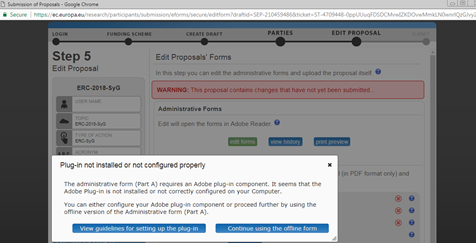
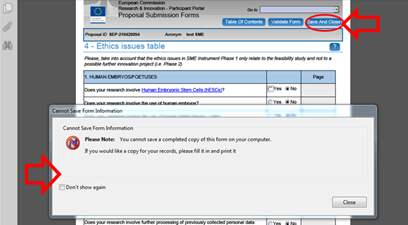
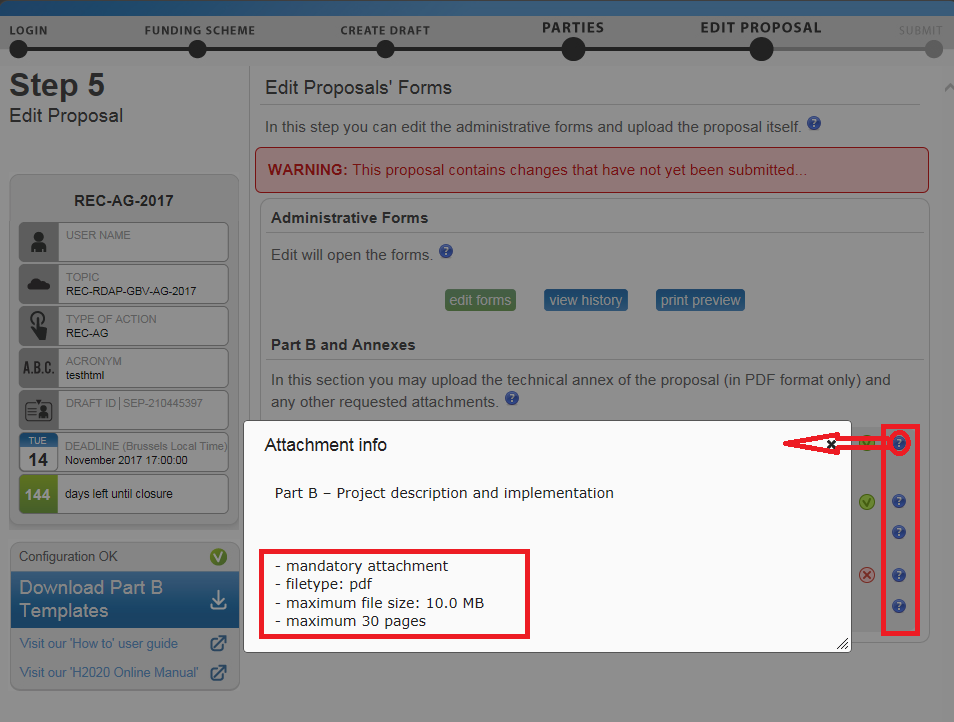
This step is the core of the submission process. You can come to this step by either clicking on the Next button, as stated above, or, to access a previously saved draft proposal form, go to Manage my area > My Proposal(s) page in the Funding & Tenders Portal (you must be logged in), click on the Actions button next to the proposal and select Edit Draft: The following image shows Step 5 of the Online Submission Wizard: When clicking the edit forms button, make sure that your administrative form looks like an embedded pdf or that you get a message inviting you to open it using Acrobat, like in the example below. If it does look like a web page (i.e. you can read "eForm" on the top of the emerging window), please use this other version of the submission manual, instead. The action buttons shown in the step 5 of the submission wizard are: Button Description Click to open the PDF form Part A that you need to complete. Click to view in detail the list of all system and user actions on the form. This function enables: Click to open or download and save a copy of the proposal locally on your computer in pdf format. This pdf cannot be edited nor submitted, but it gives you an idea of what has been filled in so far and what the EC would see if you submit your proposal right now. Click this button to download templates before the draft proposal is created. Click to upload the respective file. Click the first The form may not auto-fit in the size of your currently open window, as shown in the image below. You may need to adjust your window size, or the form size, or both: When adjusting the window size, the form opens on top of the Submission Wizard. Use the zooming (+/-) buttons to zoom the form window size in or out. The Main Contact (or the top-level role for calls with specific contact roles – see Appendix C at the end of this document) is the only person that can complete the form, including the budget table and all other administrative details. Partners can preview the form and edit their contact detail information. The list of participants and contact persons, the Participant Identification Code (PIC) and the respective summary data of the participants (shown in blue in the form) are read-only fields. To modify the list of participants or contact persons, please go back to Step 4. To modify the legal data of the organisation, please read more about it in this Data Update section. If you click on the question marks in blue, you can read more information about the sections. Each box of the form contains a short text with guidance on the format, the length and required information. Guidance for the fields displays when you bring your cursor over the boxes. Once you click on the text or start editing the information, it disappears automatically. To view the different sections in the form, you may either use the scroll bar or click on the blue "Show" buttons in the Table of contents. Validation The form has built in checks and gives error or warning messages in case fields are not completed. Please click on the Validate Form button to check your data. Errors and warnings will be listed at the end of the form. Error fields will be highlighted in red, whereas fields with warnings will be highlighted in yellow. Errors mean that mandatory information is missing (such as the Proposal Title). The proposal cannot be submitted until these errors are resolved. Warning messages do not block submission, but they indicate missing information that may be important for the proposal and, ideally, these warning messages ought to also be addressed and the information fields ought to be corrected. By clicking on the "Show" button, you can easily get back to the respective fields to correct them. Clicking the Save button saves your input at any moment. Please note that no data is actually saved until you perform the saving action. You can continue editing after clicking on Save. Before closing the form, click the Save and Close button. It just saves the data and closes the form for further editing later on, but it does not mean that the proposal is submitted yet. This will take you back to Step 5, where you can upload the Technical Annex and any additional documents. You may return to edit the form as many times as you wish before the closing date of the call. However, remember that any changes saved in the form need to be resubmitted to actually save them into the proposal, if you already submitted the form once. Action Buttons within the Form Button Description When you click this button, all data fields in the forms will be validated against a set of rules. Click to save the completed administrative form and close it for editing. Click to save your input until that moment, and continue entering new input afterwards. Before opening the form, please pay attention to the technical requirements diagnostics shown in the Step 5 screen, at the left hand bottom side of the submission system. This information is important. It refers to the configuration of the browser in your PC. If it appears as Configuration OK, the form will open embedded in your browser. However, if the message appears as Check Config, it means that your browser does not support opening the form. The form will open still in offline mode. In this case, following message will be displayed: You can check Appendix A at the end of this manual for further information about configuration of the browser, or you can click on the 'View guidelines for setting up the plug-in' in the submission system to see that same information online. If you are unable to solve the configuration for your browser, you can work with the offline version of the form. Click the 'Continue using the offline form' button. Completing the form either in online or in offline mode works the same: the functionality of all buttons, fields, and the entire process are exactly the same in both cases. After clicking 'Continue using the offline form' button, following message will be shown: Click Continue to open the form and start editing it. The message summarizes two important aspects to bear in mind when working in offline mode, which are repeated in a second warning when the offline copy is finally open. These two aspects are related to the limitation of time to update that particular offline copy, and the way you save your changes and transfer them to the EC server (i.e. your draft proposal online). Please, read this information carefully, since most of the reported issues with the offline form are linked to them: If the form cannot be completed within the 2 hours, please click the button within the form before expiration time, even if you did not finish editing the form yet. A message will be displayed informing that the changes have been sent to the European Commission's server. This message is your confirmation that the changes have been transferred to the EC server. If you do not see this message, the data was not properly saved. To start completing the form, scroll down or click on the blue Show button in the Table of Contents to navigate to the required section of your form. This is primarily an administrative form that requires general information, administrative data of participating organizations, budget information by partner, and also Call-specific information. When filling the form, if you need a clarification about a section you can click on the question marks to get a text explaining about what to provide for that field/section: Also, placing the mouse on the editable fields marked in blue displays a tip about the input you are expected to provide for that particular field: These error messages can be ignored as they are simply informing you that the forms cannot be saved on the PC drive. You need to click on the Save and close blue button in order to save the form in the system (as shown in the pictures above). Note: If changes are applied to the consortium data (Step 4) while the form is open (online mode, see first image below) or after having downloaded the form for editing (offline mode, see second image below), you need to reopen the form and validate it before being able to submit your proposal. You must click the Validate Form button to make sure that your form meets the administrative requirements. Validating the form must be done before being able to submit, if you do not run it via the Validate Form button, but you finish filling the form, you will automatically arrive to the validating results (please note, if you did not fill in all sections in the form, the validation results will not be shown, still, you will not be able to submit and you will be asked to review the errors/warnings when trying to submit). The form will run a self check and advise you of any errors or warnings, as shown below: To amend the errors or improve the items for which a warning is being shown, you can scroll to the affected sections. You will notice the affected sections are highlighted in the body of the form. All errors/warnings are highlighted in pink, the one you are currently checking is highlighted in yellow. When all issues are fixed, click the Save and Close button. Your form has now been saved on the Commission servers, but it is not yet submitted. Your proposal submission takes place next. Click the Download Part B Templates button to download the latest proposal requirements template in a readily editable RTF file. When you complete the annex forms, you must prepare them for uploading. Only the coordinator of the proposal can upload files in Part B. All annexes must be in PDF format or ZIP format, and depending on the configuration of the calls, spread sheet (xls, xlsx and ods) can also be required. A number of limitations and requirements are in place for each of the forms, depending on the call – such as, page size and page limit, document size limit, etc. Note: Make sure that you first familiarize yourself with all the specific annex form limitations and requirements in the documentation available in the respective call information package on the Funding & Tenders Portal. Your proposal will be considered ineligible if any of these formal requirements are not met. Click the question mark for each attachment in order to display the specific limitations applying to that specific attachment: The breach of certain limitations, such as document size limits, could result in failure to upload. As a result you may need to amend the documents and upload them again. If you exceed the page number limit, when applicable, you will be still able to upload the document but all of the excess pages will just contain a watermark as content: You will also see the following warning, informing that the content of those water marked pages will be dismissed during the evaluation session. In the process of completing your annex forms, and prior to uploading them, make sure that your documents comply with the mentioned requirements and recommendations, as generally outlined below. 1. PDF conversion issues and checks. 2. Limitations in document page number, font size, and page margins. Each form template, depending on the specific call, may impose certain limitations in the document formatting with regard to the maximum number of pages in the document, the minimum/maximum font size allowed, and/or the minimum margins you must allow for in the page layout. Always make sure to check and apply the guidance for the specific call, available on the Funding & Tenders Portal, as well as the instructions at the beginning of the annex form templates for each specific call. If you attempt to upload an annex form that contains more pages than the specified limit, you will not get an error message during the upload process. However, when you attempt to validate the uploaded document, the system will display a warning message, advising you to shorten and re-upload the proposal in order to allow for it to be qualified as eligible - as shown in the picture below: If the number of pages in one of the uploaded documents still exceeds the allowed limit and the deadline has not yet expired, you will receive an automatic Eligibility Warning advising you to shorten and re-upload the proposal, as shown in the picture below: After the deadline, any excess pages will be overprinted with the ‘watermark’ indicating to evaluators that these pages must be disregarded: 3. Document files size. The allowed file size of annex forms may be limited, too. Check the guidance documentation available in the topic page information package on the Funding & Tenders Portal. When the document file size exceeds the allowed limit, the system will display an error message immediately during the upload process, as shown in the picture below: 4. Graphical resolution. Use a maximum resolution of 300 dpi for all graphics and text (photocopy quality). This can dramatically reduce the PDF file size. 5. Printer-friendliness. 6. Documents file name and security. 7. Post-upload verification Once you upload your files, check their quality - download them to check whether the file transfer was successful and if the file is complete. If not, make the necessary corrections and upload again. Also note that only one file per category can be uploaded. That means that if you have several documents (e.g. CVs) they need to get merged in a single PDF file with a maximum size of up to 10MB Once the downloaded templates have been completed and are ready to upload, follow these steps to upload them: You must click the Validate button to make sure that your application meets the requirements. The system will check and advise you of any issues with all the forms, and whether your application meets the requirements of Partners, file sizes, number of pages, etc. Any errors will be displayed as indicated below: When you run a validation from the submission application via validate, you run a validation of your whole draft proposal. This includes all documents both in Part A and Part B. The following screen shows the results of validating the whole draft proposal. You have blue links for the errors and warnings. Clicking on them will expand the details for the error with new links. By clicking on these new links, you will access the affected parts in the form. Part of the validation can include reviewing previous steps, such as the Step 4 for managing related parties: When this is the case, clicking the link Please go back to STEP 4 above will take you back to the administrative form, where you cannot actually apply amendments. Please go to Step 4 by clicking the button in order to correct this kind of warning/error. When all errors and warnings are corrected, click the Validate button again to make sure you have not missed anything. Once you get the No Errors validation screen, click the Submit button. Your proposal has now been submitted and the system displays a message indicating that the proposal has been received. The submission is completed when the Proposal Coordinator clicks the Submit button and receives an email confirming that the proposal has been received. Uploading the Annex documents in itself does not finalise the submission process. Therefore, we advise you to upload your proposal as early as possible, and to submit it at least 48 hours before the deadline. Otherwise, there is a serious risk that you will not be able to submit it on time. 


The Action Buttons Edit Proposals Form
![]()
![]()
![]()

Click to download the latest proposal requirements package, in a readily editable (RTF) template.
Once completed, you must convert the proposal template into a PDF file.![]()
The upload process for the complete set of files can take between a few seconds and a few minutes, depending on the speed of your Internet connection. When the upload is complete, the system displays a confirmation message and creates the respective entry in the history log.
Please check the requirements for uploading your files below.Familiarising Yourself with the Wizard and the Form
![]() button at the top of the screen to read the general help instructions for editing proposal forms, as shown on the image below:
button at the top of the screen to read the general help instructions for editing proposal forms, as shown on the image below: 
Click the ![]() button in the Administrative Forms section to read the help instructions for editing the administrative forms of the proposal, as shown on the visual example below:
button in the Administrative Forms section to read the help instructions for editing the administrative forms of the proposal, as shown on the visual example below:

![]() Note: Click the edit forms button to start editing the forms. Depending on the configuration of your browser, the form will be open embedded in your browser (i.e. online mode) or as a downloaded PDF form (i.e. offline form). Please see the Minimum Technical Requirements section for more information on how to configure your browser. See Working in offline mode below to see some important aspects when you are editing the form as a downloaded PDF form (i.e. outside your browser).
Note: Click the edit forms button to start editing the forms. Depending on the configuration of your browser, the form will be open embedded in your browser (i.e. online mode) or as a downloaded PDF form (i.e. offline form). Please see the Minimum Technical Requirements section for more information on how to configure your browser. See Working in offline mode below to see some important aspects when you are editing the form as a downloaded PDF form (i.e. outside your browser).

Alternatively, you can specify the percentage ratio in the % drop-down list: either select a pre-defined percentage from the drop-down list (i.e. 150%) or type in the desired number directly in the field. You may need to adjust your window size, or the form size, or both: When adjusting the window size, you will notice that the form has been opened on top of the Submission Wizard.See the image above.
![]() Note: While the form is open, please do not apply any changes to the consortium within the Submission Wizard. Should the consortium be modified, please close the form first, and then go back to Step 4 of the wizard to apply those changes. Modifying the consortium while the form is still open can generate a conflict preventing you from submitting later on.
Note: While the form is open, please do not apply any changes to the consortium within the Submission Wizard. Should the consortium be modified, please close the form first, and then go back to Step 4 of the wizard to apply those changes. Modifying the consortium while the form is still open can generate a conflict preventing you from submitting later on. What You Need to Know about Completing the Form
Who Can Fill In the Form?
Click the Edit forms button to access the forms. Read-only Fields
Guidance in the Form
Navigation in the Form
Saving of the Data
Two action buttons in the PDF form help you find and verify the information easily.![]()
The system assesses if the available data is valid, checks the data formats, performs computations, and checks interlinked data for consistency.
Any issues found in the form are reported at the end of the PDF form.![]()
You can save your form data even if the form is not completely filled in - you can edit it at any moment prior to the deadline. Save and Close does not validate the data nor submit your proposal.
Working in Offline Mode


Please note that the offline copy has a time stamp from the commission's server expiring after 2 hours. If the offline copy is not saved within 2 hours using the Save and Close button within the form, the changes you made offline cannot be saved into your online draft proposal. In that case, you will need to download a new copy and start over again.
The expiration time is displayed in the footer of the form, right side:

To continue editing the form, please access your draft proposal once more, and download the form again. You can continue working on it for another 2 hours. Before the form expires, save and close it again. Then, download a new copy by accessing your draft proposal. Perform this action as many times as needed until the form has been completed.
To save your data, you need to use the Save and Close button only. This is the same button to save data when working online. When you work offline, because of opening it in adobe Reader, you could feel tempted to use the Adobe Reader function buttons/menus. Please, do not do so.
![]() Note: When you click Save and Close, the Validate Form and the Save and Close buttons are disabled and they are not visible any more. Even if a copy of the form remains open in your Adobe reader, you cannot use that form anymore. Please close it, access your draft proposal and download a new copy from there for further editing.If you see the following message concerning the Protected View functionality in the reader when opening the form offline, please click on Enable All Features to display the content of the form.
Note: When you click Save and Close, the Validate Form and the Save and Close buttons are disabled and they are not visible any more. Even if a copy of the form remains open in your Adobe reader, you cannot use that form anymore. Please close it, access your draft proposal and download a new copy from there for further editing.If you see the following message concerning the Protected View functionality in the reader when opening the form offline, please click on Enable All Features to display the content of the form.
You are advised to run a test in order to ensure that you are able to send data to the EC servers using the offline form.Editing and Completing the Form


![]() Note: It is likely that when opening/editing the form, one of the messages below are displayed:
Note: It is likely that when opening/editing the form, one of the messages below are displayed: 


Validating, Saving and Closing the Form


You can also click on the Show Error / Show Warning buttons from the validation results to access the concerned parts directly. If the errors/warnings are related to missing organisations or main contacts in the consortium, the Show Error / Show Warning buttons will take to the part in the form where you find those problems, but to fix this specific issues you need to save and close the form and go back to Step 4 in the wizard. Part B – Downloading and Completing the Annex Forms

The template describes the information that must be included in your application and how to structure that information. You will need to complete this package as thoroughly as possible. You may want to also check with Enterprise Europe Network and your National Contacts Point for Assistance (see the Support menu of the Funding & Tenders Portal). It is important that you remain within the file size and page limits that a proposal may have. Once you have completed your proposal based on the downloaded template, you must convert it into a PDF file, which you will then upload as an Annex form of the proposal. This is referred to as Part B of your proposal.Part B - Uploading the Annex Forms


![]() Note : Make sure that the files you upload can be opened and printed without any problems. If the Commission encounters a problem when opening or printing a file you have uploaded as part of a proposal, the complete proposal will be considered ineligible.
Note : Make sure that the files you upload can be opened and printed without any problems. If the Commission encounters a problem when opening or printing a file you have uploaded as part of a proposal, the complete proposal will be considered ineligible.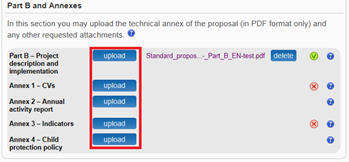

Note: If the file uploaded is not in a valid PDF format, an error message will appear instead of the confirmation message.

Validate and Submit your Application

![]() Note: that this action is not exactly the same as clicking on Validate Form within the form. When you run a validation from within the form, the validation checks only the content of the form, i.e. the administrative form in part A.
Note: that this action is not exactly the same as clicking on Validate Form within the form. When you run a validation from within the form, the validation checks only the content of the form, i.e. the administrative form in part A.

However, the affected items will not be highlighted anymore. You are advised to run both validations in different moments. When filling in the form, use the validate form functionality within the form. Before submitting your proposal, run a validation from the submission application to check if your application is ready to be sent by clicking on the action button Validate.
The Submitted status will also be shown on the My proposals page of the Funding & Tenders Portal. The system also sends a submission confirmation e-mail to the Proposal Coordinator, containing the details of the submitted proposal. Note that the e-mail could end up in the spam folder or get blocked by the anti-spam system of your organisations, so make sure that you check your inbox regularly.
You can upload your Annex documents or submit your proposal as many times as you wish prior to the call deadline, but it is strongly advised not to wait until the final moment to perform these operations. Each time you upload a new Annex document, you must click the Submit button , if you want to save your changes.
Video
To watch a video of this task being performed, click the image below:

Download the whole Proposal Submission Service User Guide as an Adobe PDF file.