Instructions when using the Funding & Tenders Portal
By default, the projects in which your organisation is participating will be visible to you only if a role at level of the project is allocated to your profile, even if you are the LEAR of the organisation. In this page we describe how to request and grant the read only access or an active role for a project/proposal in order to view its details via the |
...
...
Proposals tabs within the information of |
...
Requesting access to a project
...
the Manage my area.  This is applicable both to LEARs and Account Administrators. Granting LEAR access, will grant also read access to the project/proposal to Account Administrators. This is applicable both to LEARs and Account Administrators. Granting LEAR access, will grant also read access to the project/proposal to Account Administrators.
|
When logging to F&T Portal, |
|
...
...
Organisations on the left. This applies only to organisations where you are LEAR/Account administrator from the list of your organisations. This means that the status is validated and you have the |
|
...
option Modify Organisation |
|
...
...
...
button on the right. 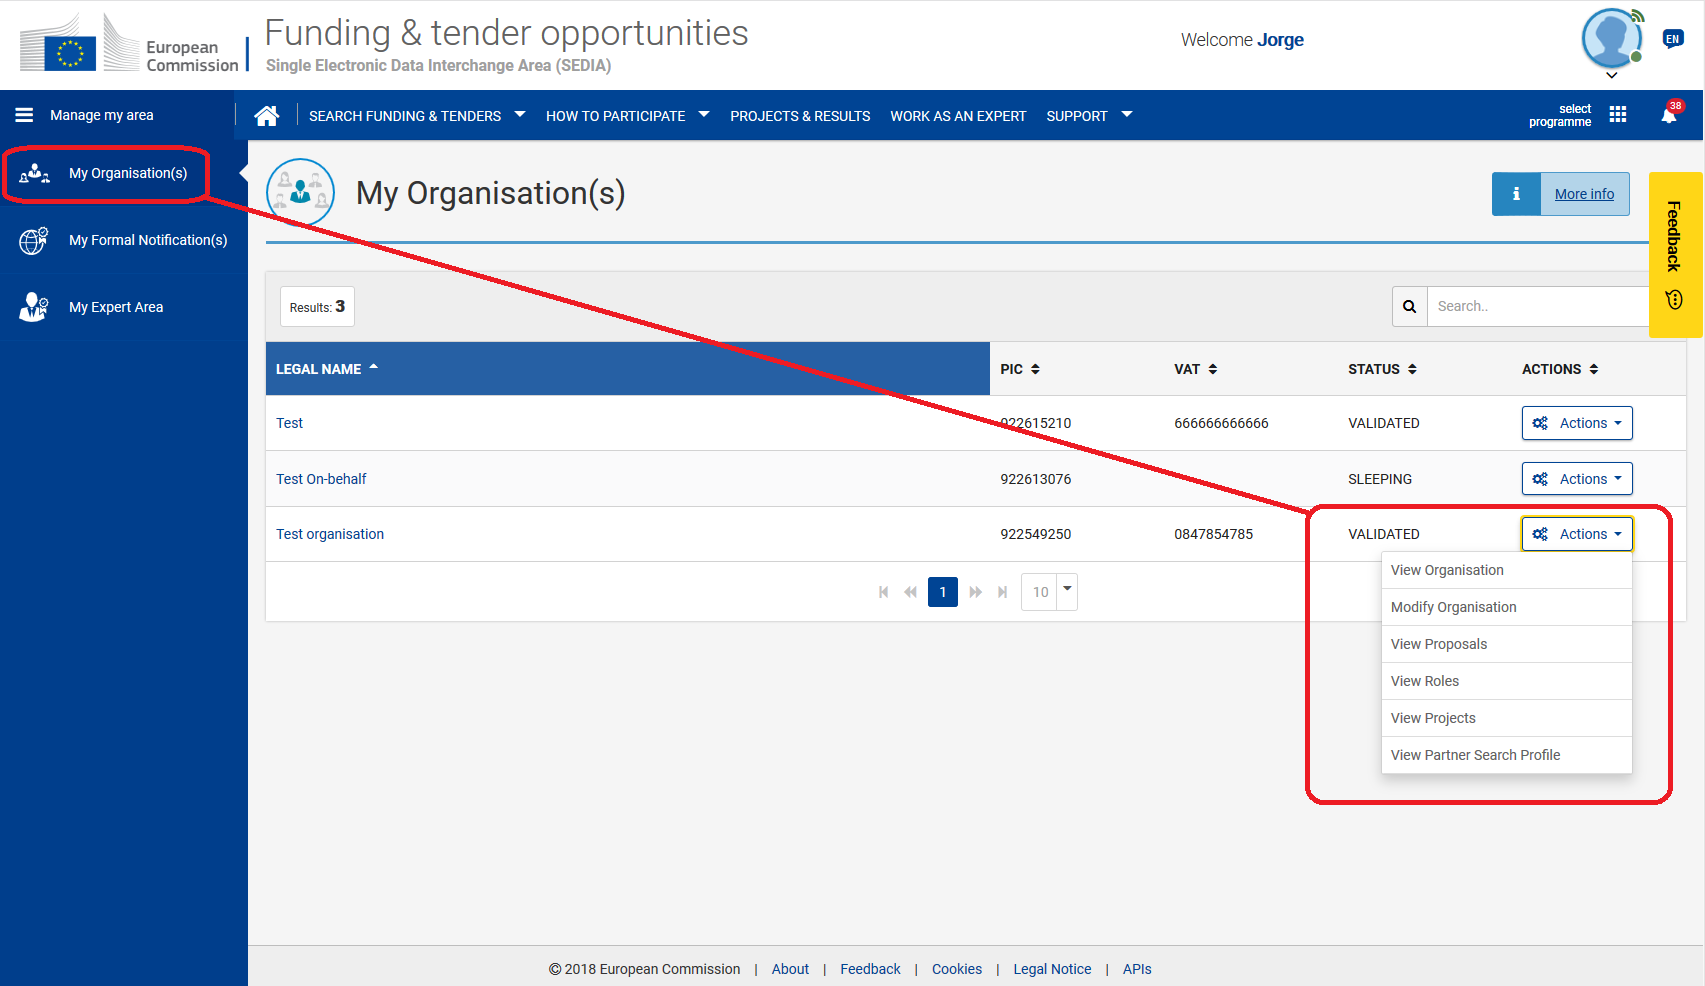 Image Modified Image Modified
Click on the Legal Name of the organisation to display the details, and on |
|
...
...
...
...
tab to see the projects/proposal where your organisation is participating.  Image Modified Image Modified
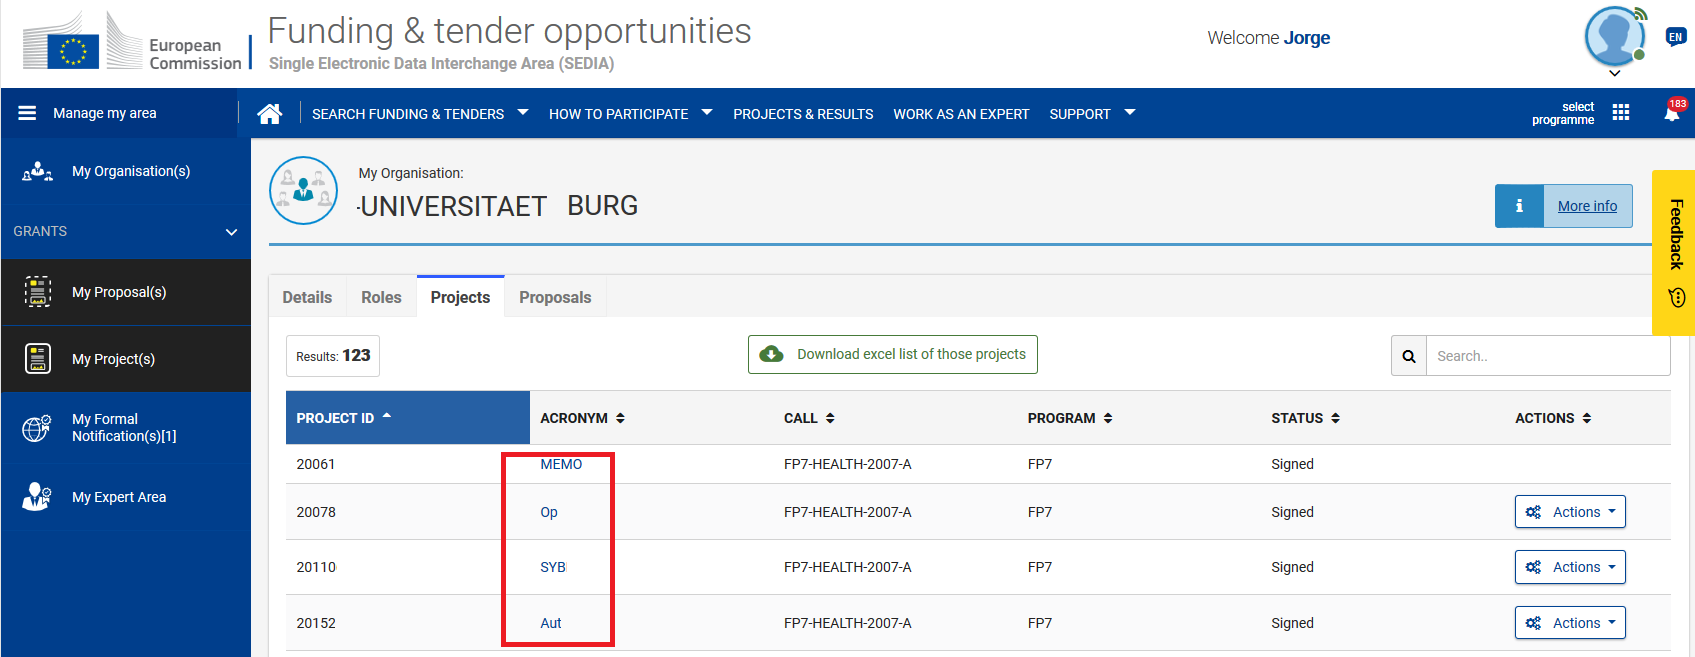 Image Modified Image Modified
Organisations can be involved in a project where the LEAR/Account administrator does not have an actual team member role (roles in the consortium). Click on the Acronym of a project. If you do not have a project role, following message gets displayed 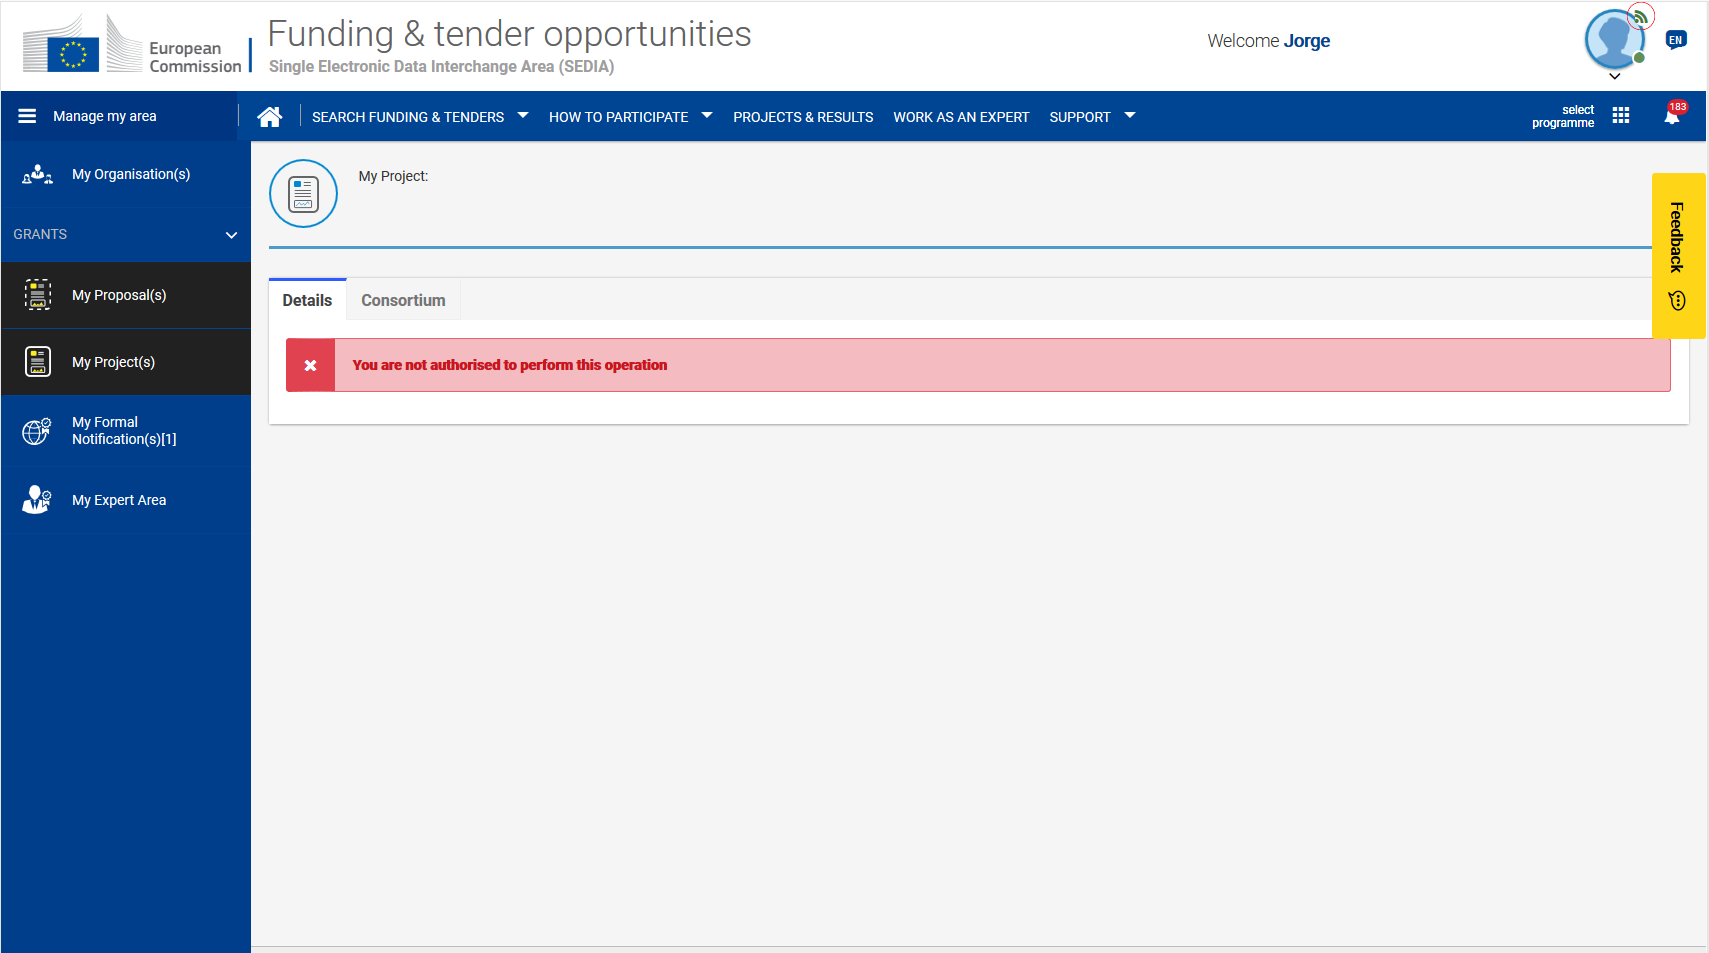 Image Modified Image Modified
 Tip: Tip:
|
|
...
...
...
...
button for a project or a proposal, it means that you do not have a specific role on the project or on the proposal |
|
...
. 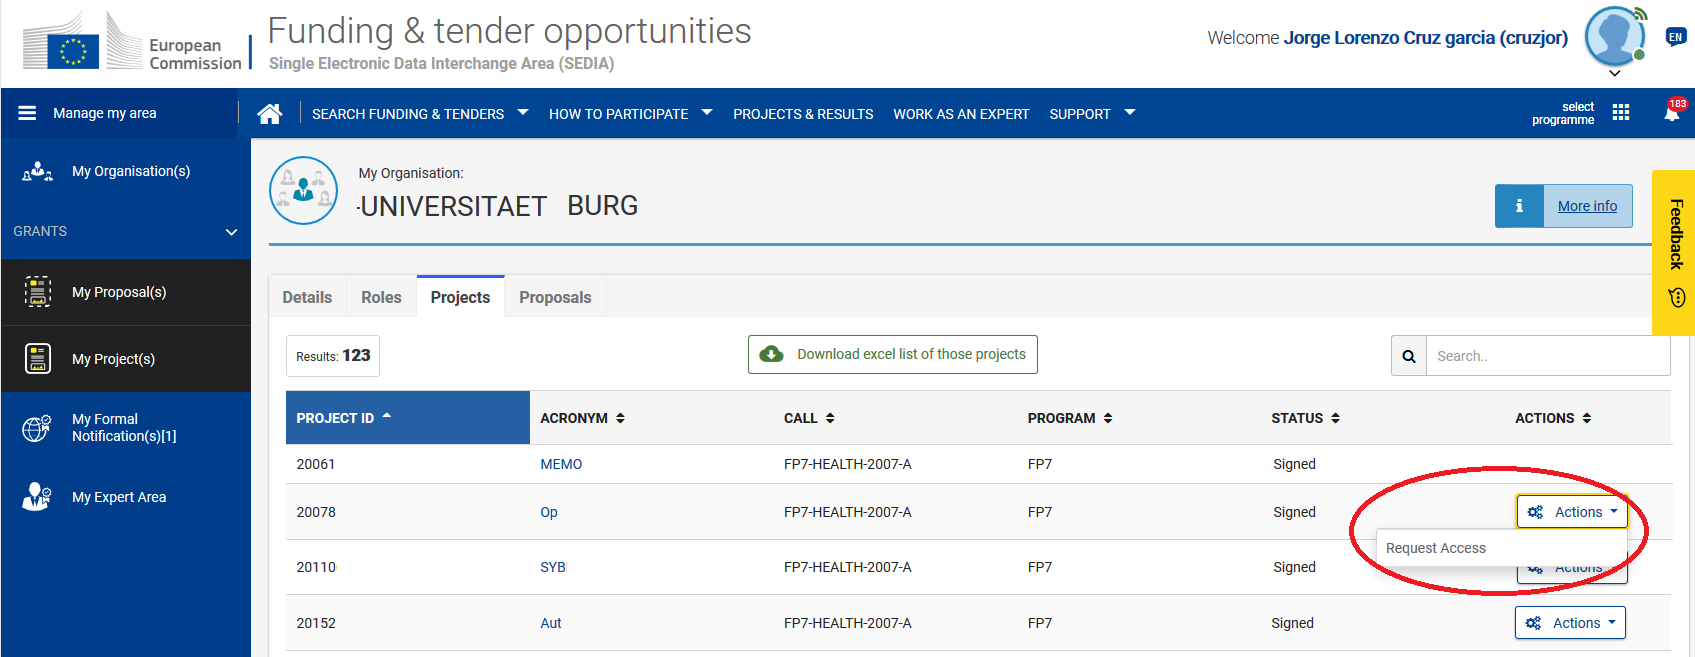 Image Modified Image Modified
Select the Request Access |
|
...
under Actions. A pop-up window displays with two possible options 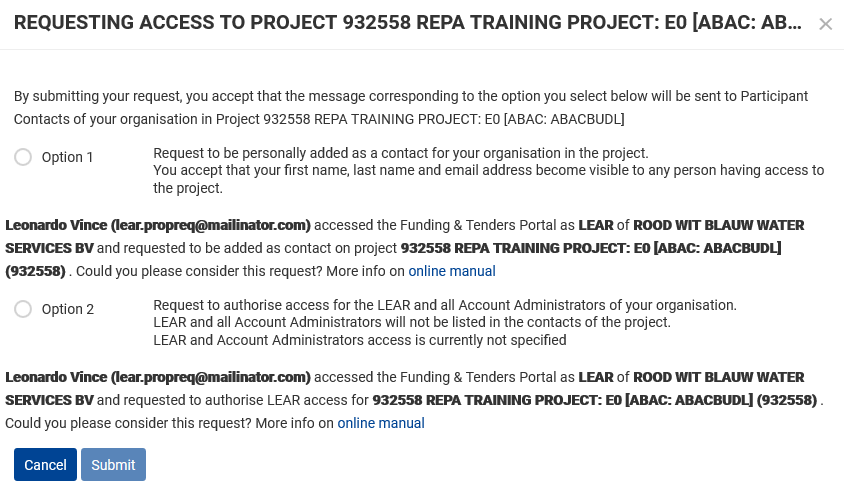 Image Modified Image Modified
Select option 1 if you want to be given a project role within the project. Select option 2 if you just want to have read access to the project. Click |
|
...
on submit. When done, a confirmation message will shortly display on the right-lower corner of the browser.  Image Modified Image Modified
If your organisation is the coordinating organisation in the project, the email will be sent to the PCoCo/CoCo. If your organisation is not coordinating the project, the email will be sent to the PaCo. Read more about roles |
|
...
...
PCoCo/CoCo or PaCo, depending of the situation, receives email notification informing of the request.  Image Modified Image Modified
The notification is also accessible |
|
...
via My Notifications, which you can access by clicking on the bell icon on the right of the screen. 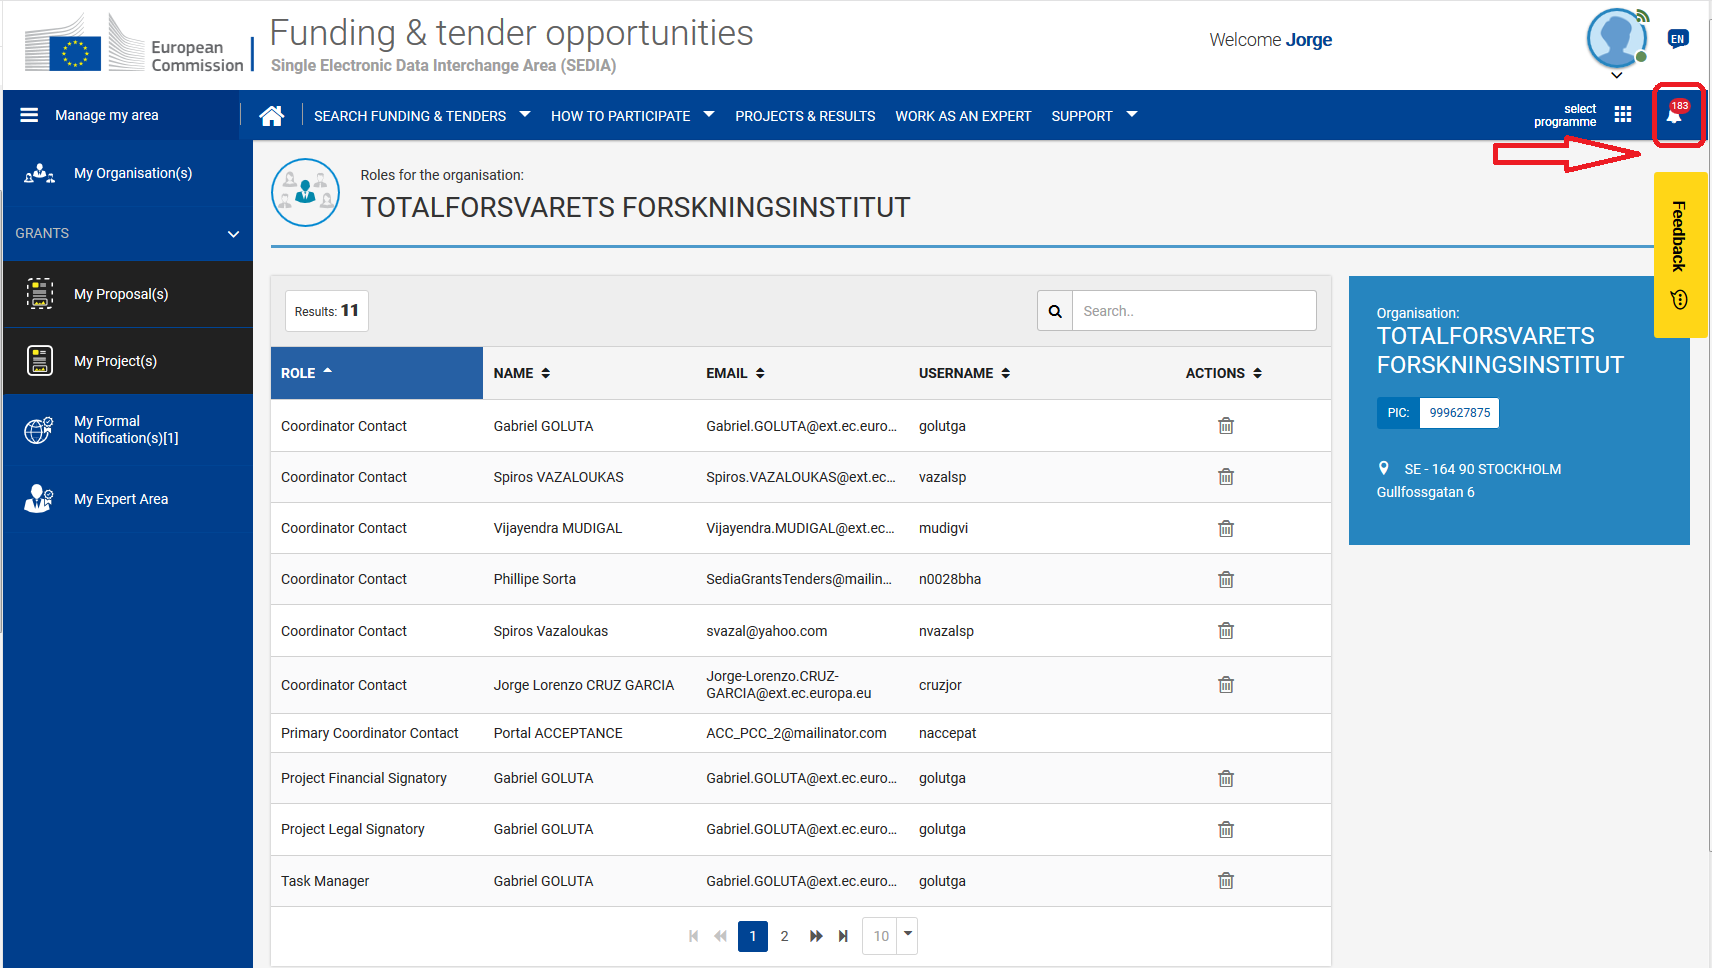 Image Modified Image Modified
However, the content of the notification and the steps to be taken will be different depending on the selected option. Option 1: When user requests to be added a contact of the project. The message indicates "requested to be added as contact on project" + Project ID-Name and Pic numbers.  Image Modified Image Modified
Option 2: When user requests to have read access to the project without a role in the project. The message indicates "requested to authorise LEAR access for project" + Project ID-Name and PIC. 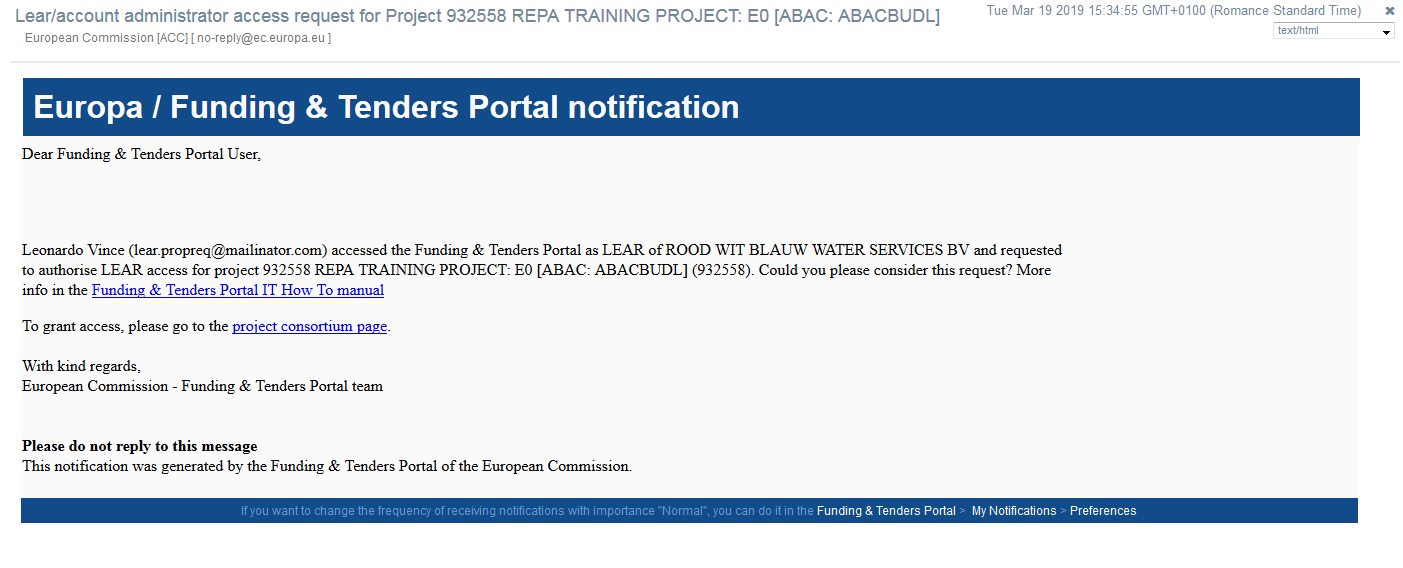 Image Modified Image Modified
In both cases, the notification contains a link, and if the request is for access to a proposal instead of a project, the word 'project' will be substituted by 'proposal'. Clicking on the link takes you to the project consortium page. Then proceed as follows: For option 1 |
|
...
(active role)Access My projects |
|
...
and select Project Consortium from the options under |
|
...
...
button if not using the link from the message. 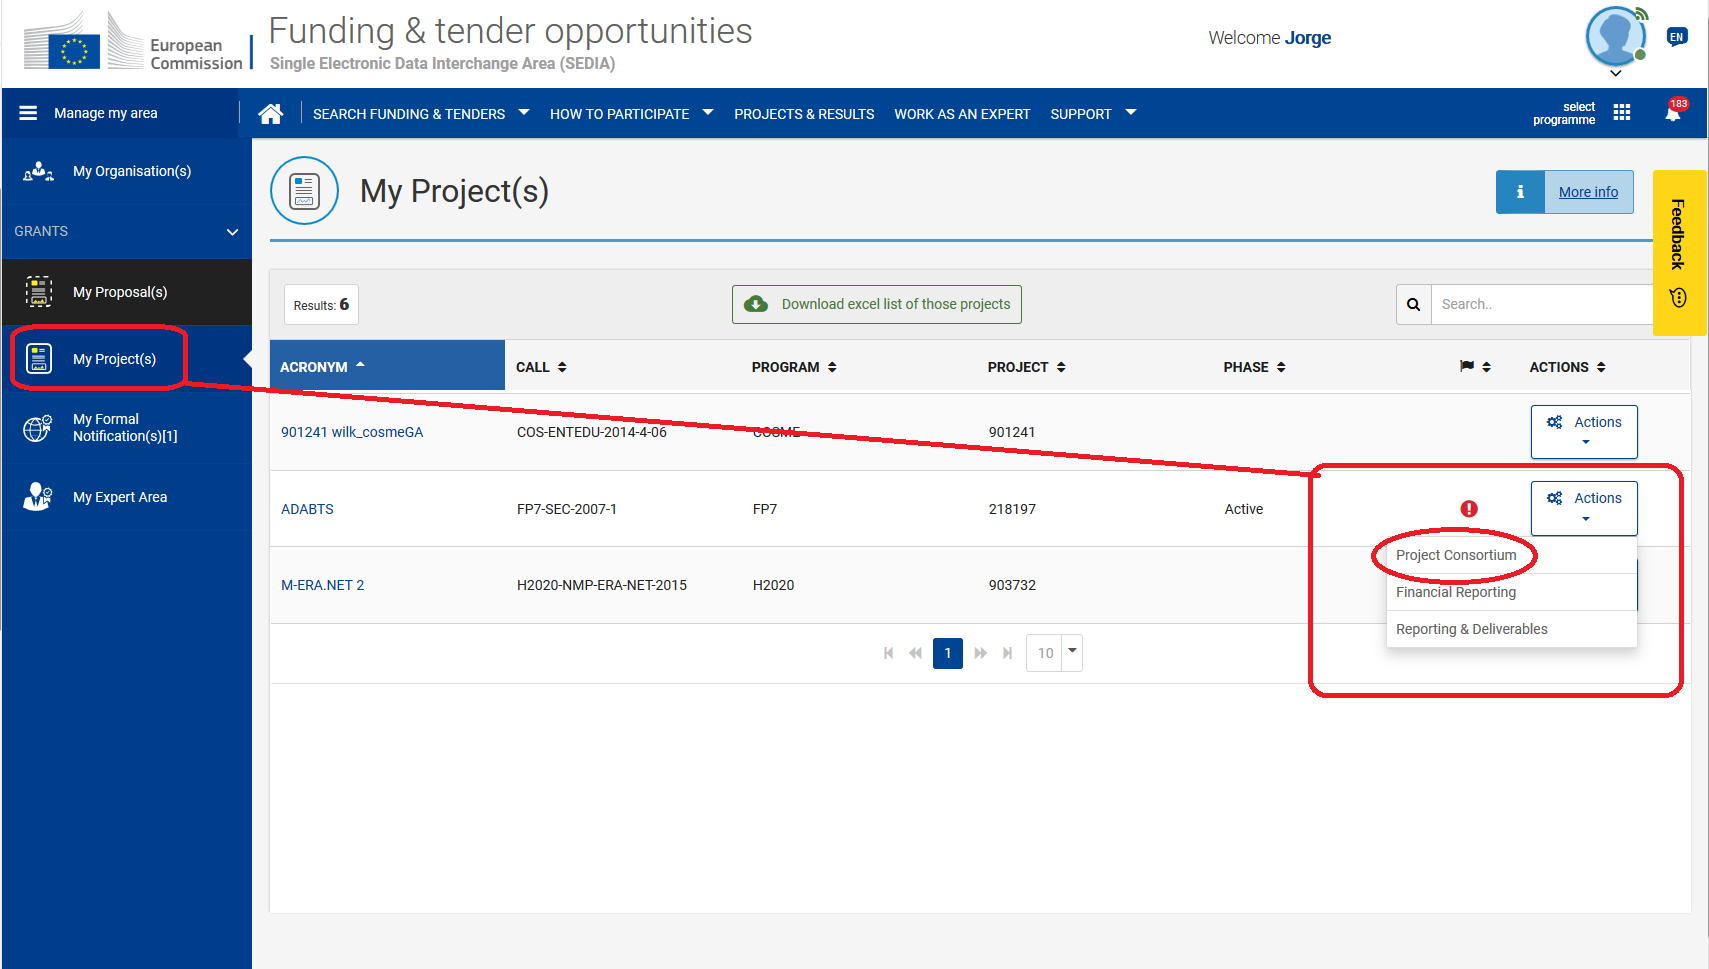 Image Modified Image Modified
Then click on |
|
...
...
button of the corresponding organisation.  Image Modified Image Modified
In the following screen, click |
|
...
on the Add Roles. 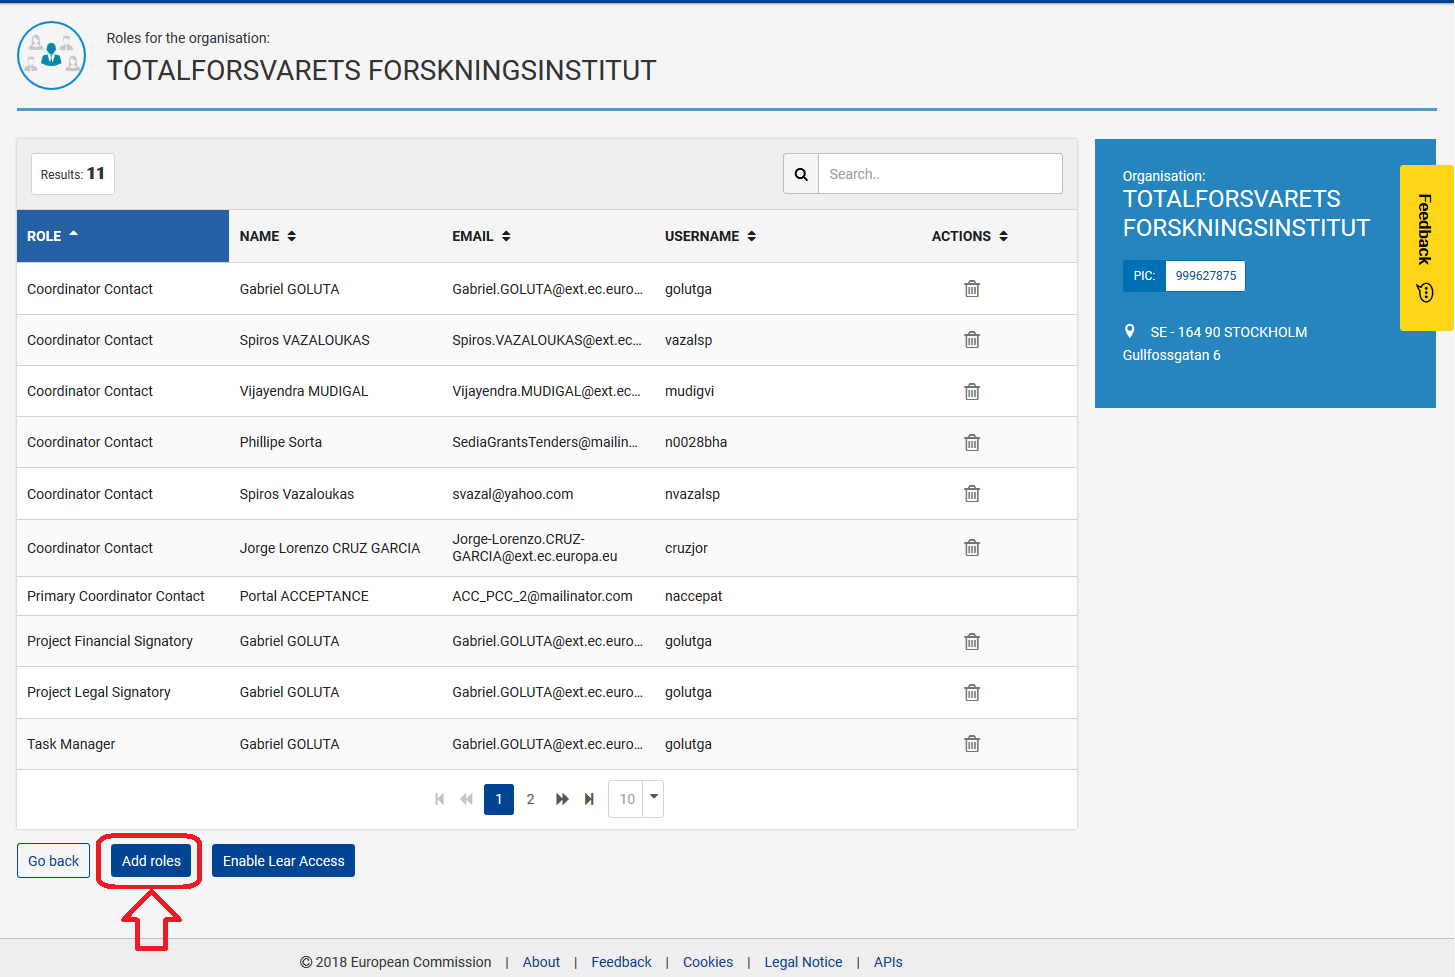 Image Modified Image Modified
Then select the role and fill in the name and email details. Click |
|
...
...
to confirm. 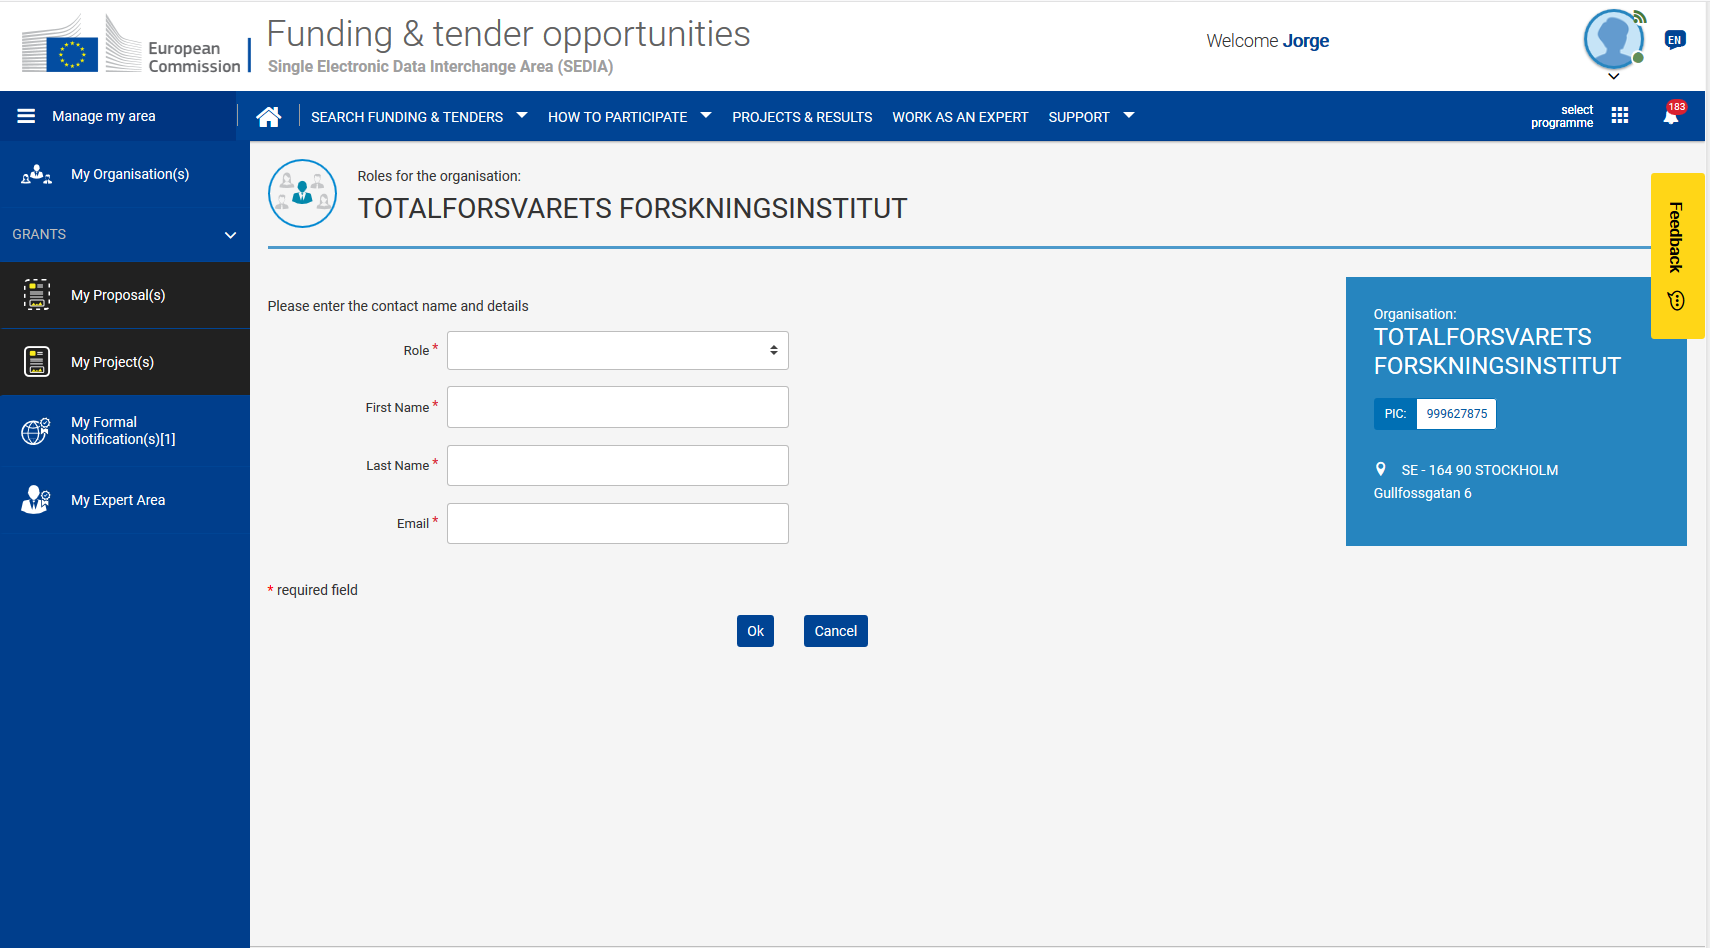 Image Modified Image Modified
For option 2 |
|
...
(read only access)Access My projects |
|
...
and select Project Consortium from the options under |
|
...
...
button if not using the link from the message. Image Modified Then click on |
|
...
...
button of the corresponding organisation. Image Modified In the following screen, click |
|
...
on the Enable Lear Access.  Image Modified Image Modified
A confirmation pop-up window will display on the right-lower corner of the browser. 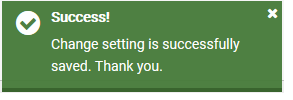 Image Modified Image Modified
Note: When you grant access to projects or proposals for LEARS/Account administrator, |
|
...
...
becomes Disable Lear Access, click on it to remove their read access.  Image Modified Image Modified
|
|
...
Instructions when using the Participant Portal
By default, the projects in which your organisation is participating will be visible to you only if a role at level of the project is your profile, even if you are the LEAR of the organisation.
In this page we describe how to request and grant the read only access or an active role for a project/proposal in order to view its details via the Projects / Proposals tabs within the information of My Organisations, under the My Area section within the Participant Portal.
Requesting access to a project
When logging to PP, go to My Organisations.
This applies only to organisations where you are LEAR/Account administrator.
 Image Removed
Click on the organisation to display the details, and on the Projects or on the Proposals tab to see the projects/proposal where your organisation is participating.
Image Removed
Organisations can be involved in a project where the LEAR/Account administrator does not have an actual team member role (roles on project level). Click on the Acronym of a project. If you do not have a project role, following message gets displayed (Tip: Whenever you see a RA button, it means that you do not have access to that specific project).
Image Removed
Go back to the organisation. Then click on the RA button to request access.
Image Removed
Select option 1 if you want to be given a project role within the project. Select option 2 if you just want to have read access to the project. Fill in the captcha and click on submit.
When done, a message is shown confirming that the request got submitted via a pop-up window.
Image Removed
If your organisation is the coordinating organisation in the project, the email will be sent to the PCoCo/CoCo. If your organisation is not coordinating the project, the email will be sent to the PaCo. Read more about roles here.
Granting access to a project
PCoCo/CoCo or PaCo, depending of the situation, receives email notification informing of the request.
Image Removed
The notification is also accessible via My Area /My Notifications. Regardless of the option selected by the user, the title of the notification will look the same.
Image Removed
However, the content of the notification and the steps to be taken will be different depending on the selected option.
Option 1: When user requests to be added a contact of the project. The message indicates "requested to be added as contact on project" + Project ID-Name and Pic numbers.
Image Removed
Option 2: When user requests to have read access to the project without a role in the project. The message indicates "requested to authorise LEAR access for project" + Project ID-Name and PIC.
Image Removed
In both cases, the notification contains a link. Clicking on the link takes the user to the project consortium page. Then proceed as follows:
For option 1:
Click on the Edit Roles button of the corresponding organisation.
Image Removed
In the following screen, click on the Add Roles
Image Removed
Then select the role and fill in the name and email details. Click on OK to confirm.
Image Removed
For option 2:
Click on the Edit Roles button of the corresponding organisation.
Image Removed
You will see the current participant contacts and two radio buttons below the role participant contacts. Select the Authorised (recommended) one to grant read access to the LEAR/Account Administrator, Not Authorised to prevent them from seeing the project details.
Image Removed
After selecting the corresponding radio button, a message will be displayed confirming that the setting is save; just close the window, afterwards (there is no further buttons to confirm selection):
Image Removed
...