Re-issuing a Quality/Product certificate
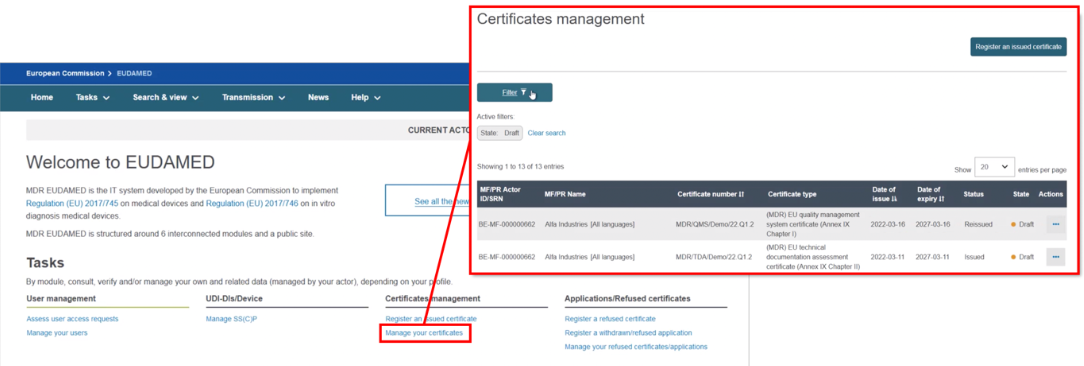
To re-issue a certificate, for example due to its imminent expiry, click on the Certificates management page then filter to identify the certificate you want to re-issue:
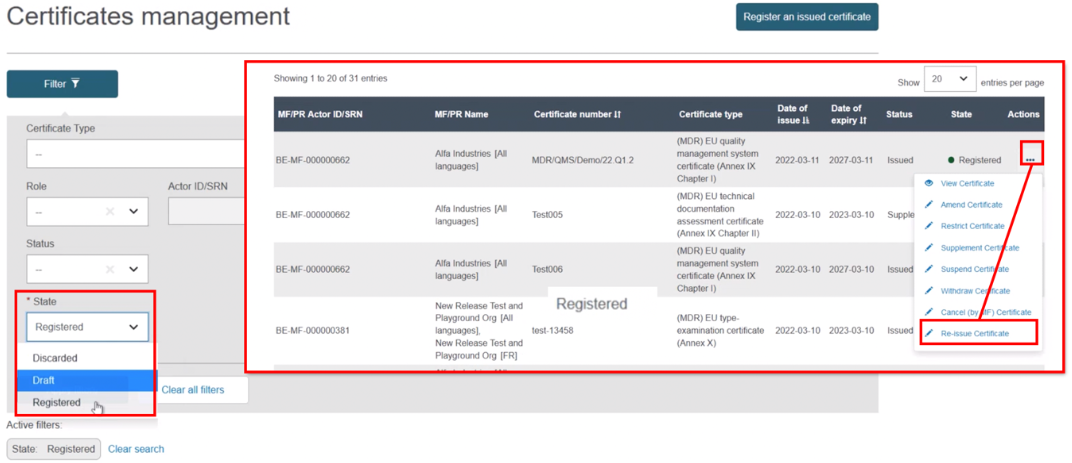
Select Registered as the state. From the list generated, in the Actions menu click the three dots next to the intended issued certificate and select Re-issue Certificate:
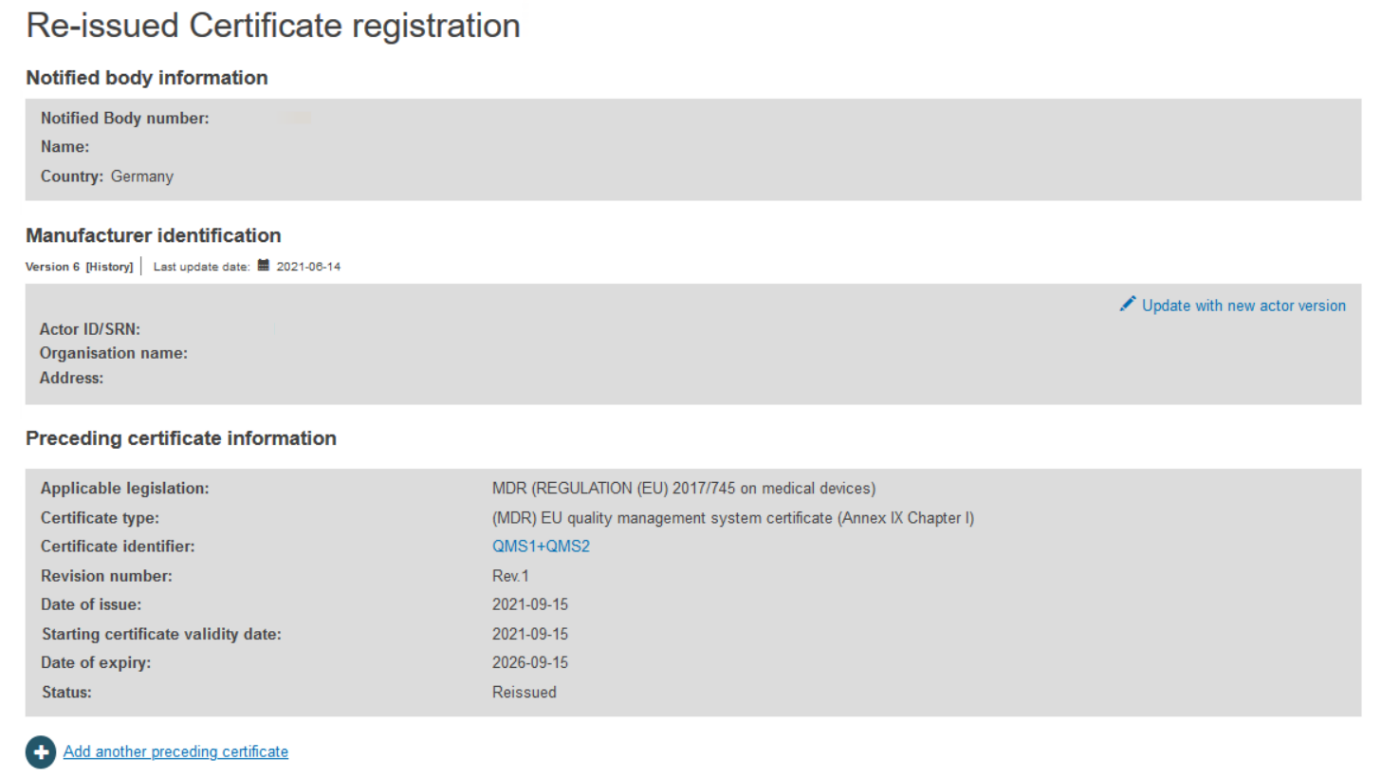
The next screen will display all relevant information of the certificate. If necessary, click Update with new actor version:
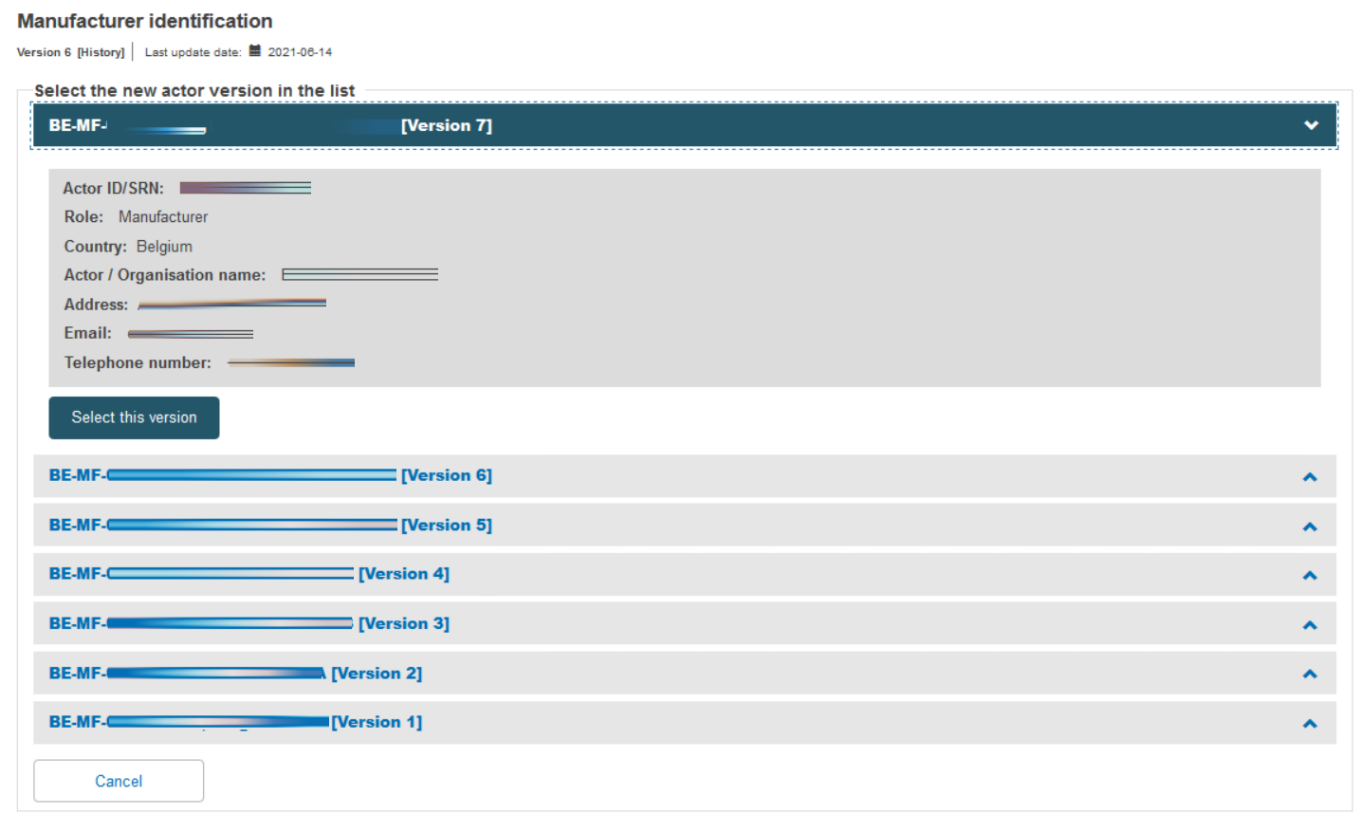
Select the right actor version from the list:
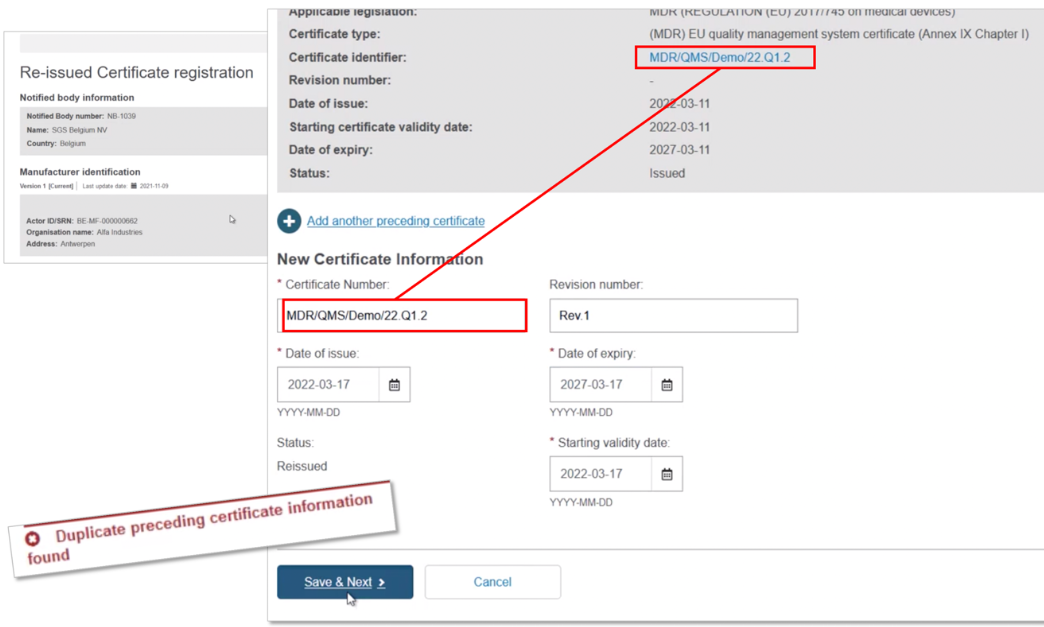
Scroll down to the New Certificate Information section. Duplicate the certificate identifier, and note the duplication warning message. Add a Revision number so it differs from the preceding certificate – the warning disappears. Select the new issue date, validity date and expiry date (noting the maximum period is five years). Now click on Save & Next to proceed:
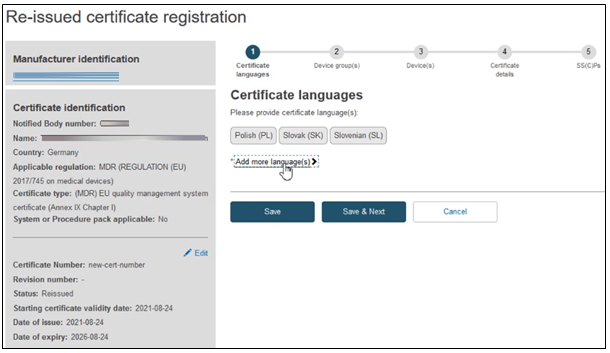
The next screen will display a timeline of steps to follow. Follow the order, starting from the first section Certificate languages.
Click on Add more languages if necessary:
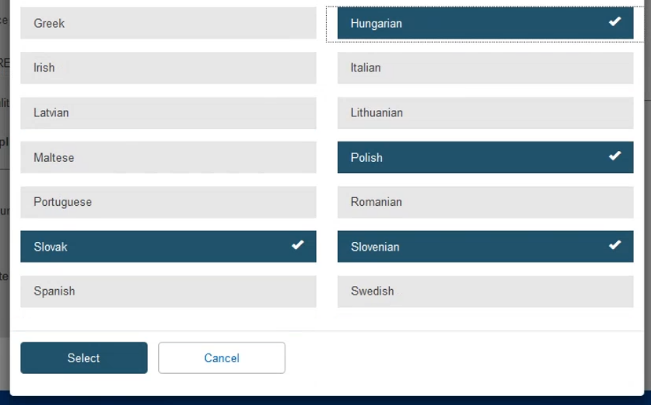
On the pop-up window, click on the desired languages and press Select:
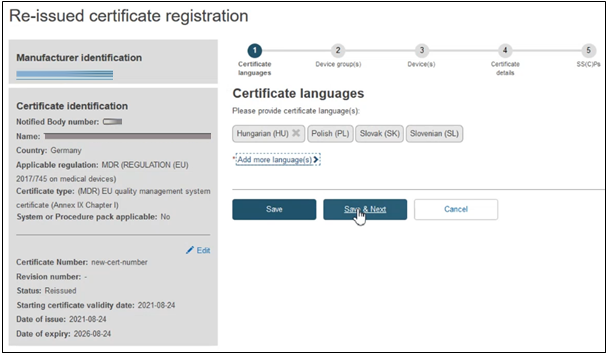
Click Save & Next to proceed to the next section:
Fill in the information required to complete the Device group(s) step, when a certificate is re-issued, no change can be made.
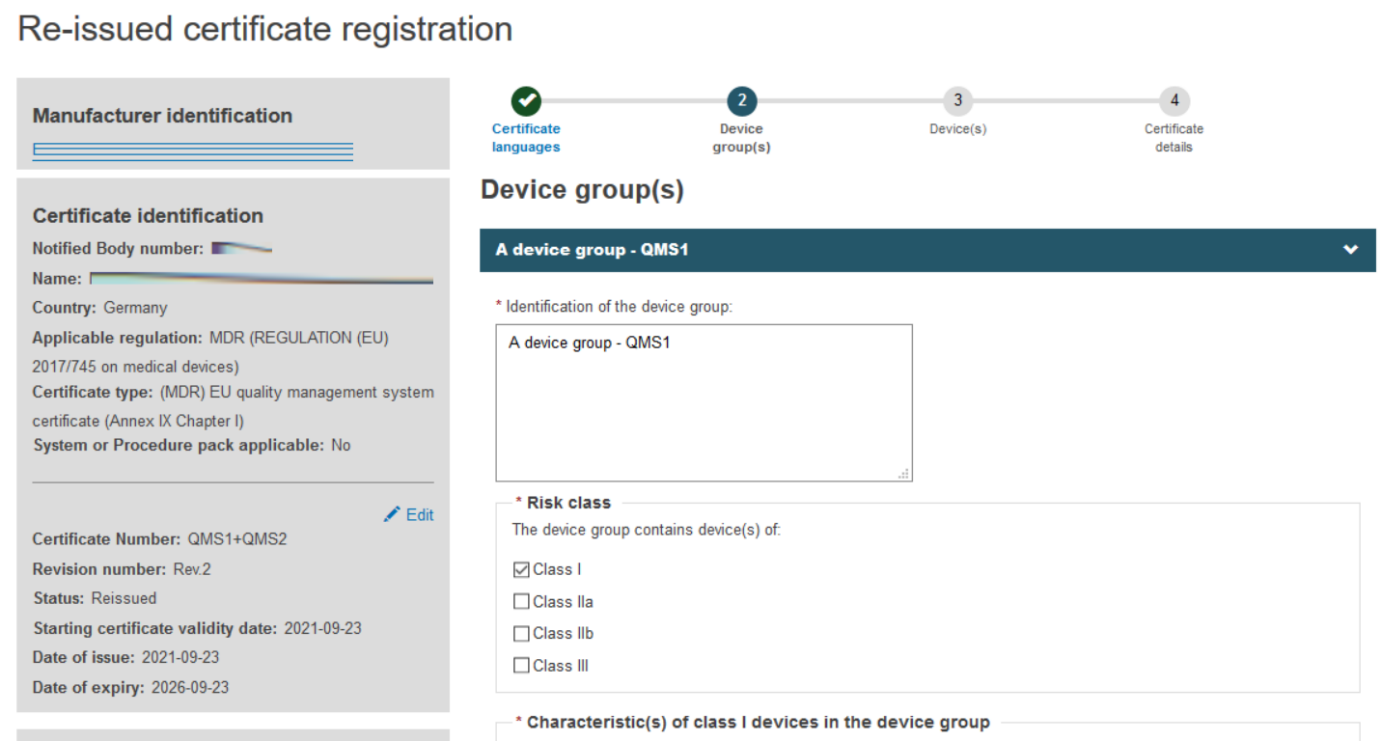
Click + Add a device group and then again on the appearing Device group item:
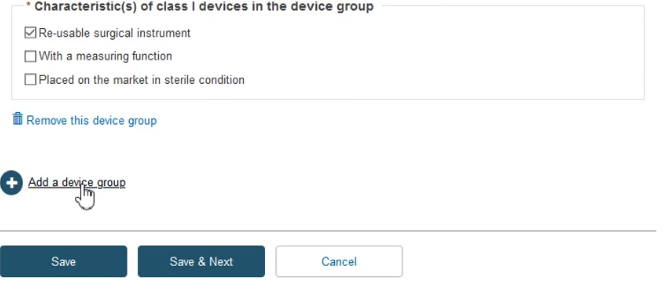
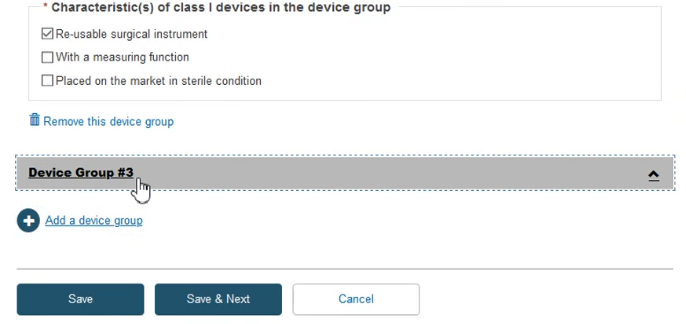
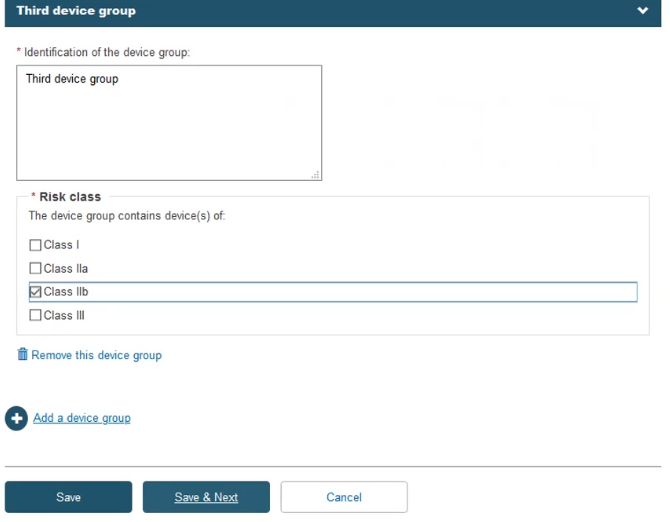
Fill in the required information and click Save & Next:
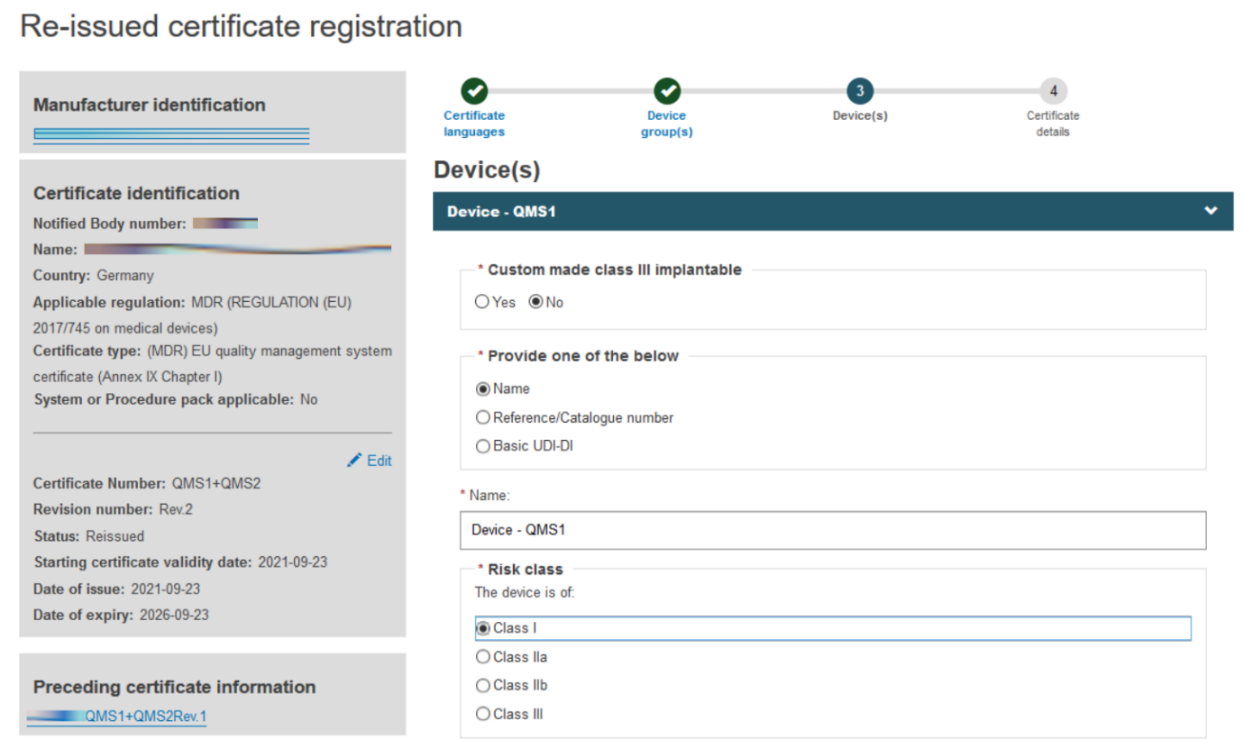
Fill in the information for the Device(s) step:
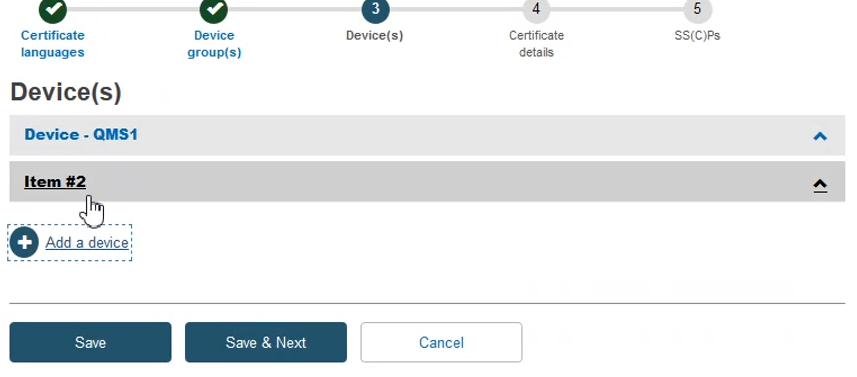
Click + Add a device group and then click on the Item that displays under Device(s):
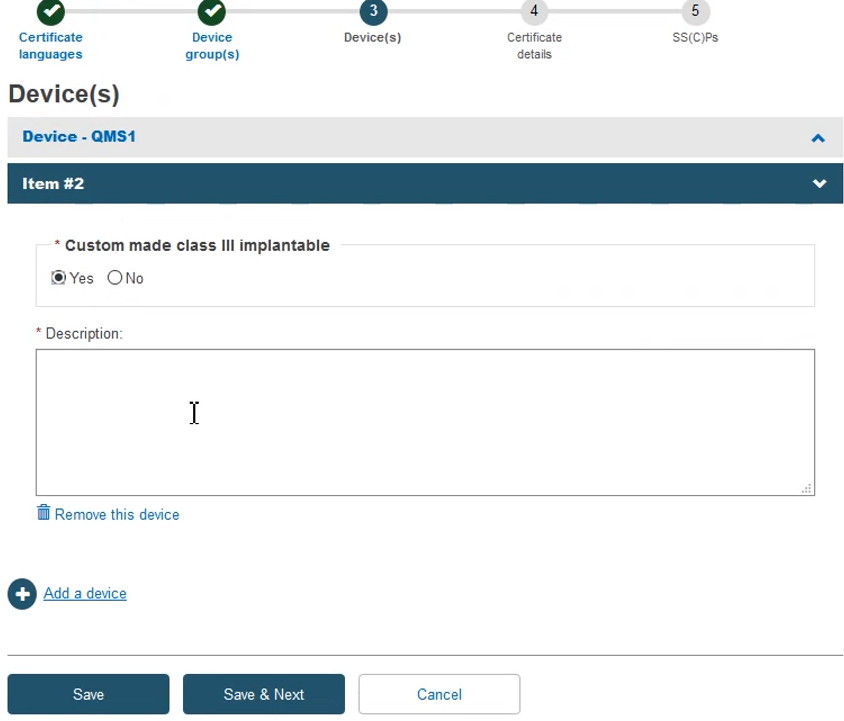
Add the required information to complete this step and then click Save & Next:
Fill in the information required to complete the Certificate details step:
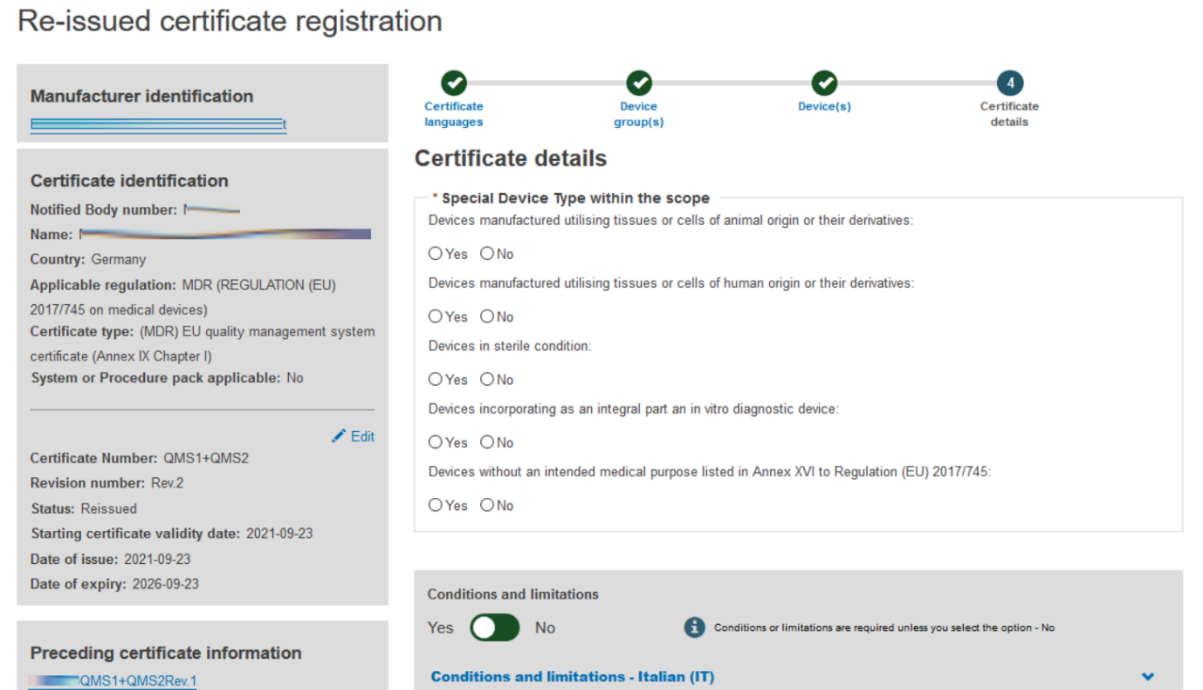
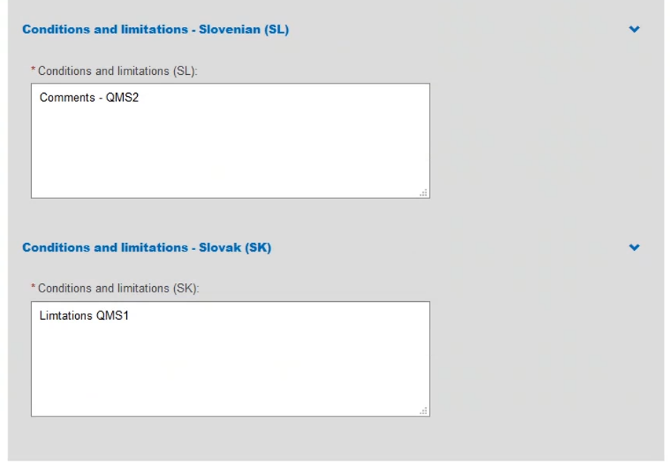
Provide comments regarding Conditions and Limitations in each language you selected:
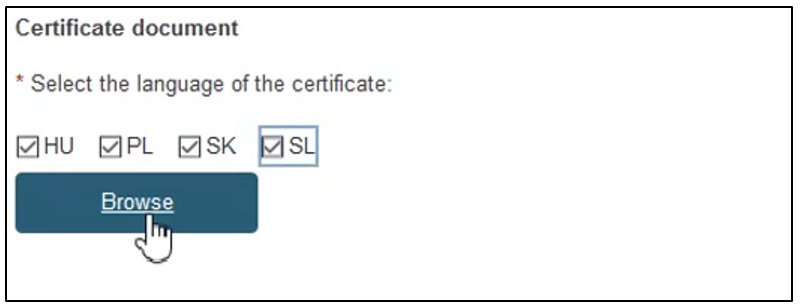
To provide the new re-issued certificate document, tick the relevant languages and click Browse to upload the document(s) from your computer. You can upload either one document per language or one document covering all languages:
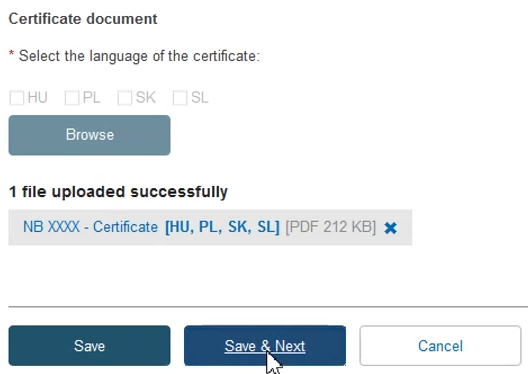
Once you have successfully uploaded the new certificate document(s), click Save & Next:
At this point, depending on the specifics of the certificate, the system may take you to the next step called SS(C)Ps. If not relevant for the specific certificate, this step will be omitted. You have three possibilities when adding new devices.
 Add device(s) to an existing SS(C)P from the preceding certificate (see Step 19).
 Add device(s) to a new version of the SS(C)P from the preceding certificate (see Step 20).
 Add device(s) to a newly registered SS(C)P (see Step 21).
Add device(s) to an existing SS(C)P from the preceding certificate.
Click on Add SS(C)P. The existing devices show, but are inactive. Select any new device(s) and click Confirm:
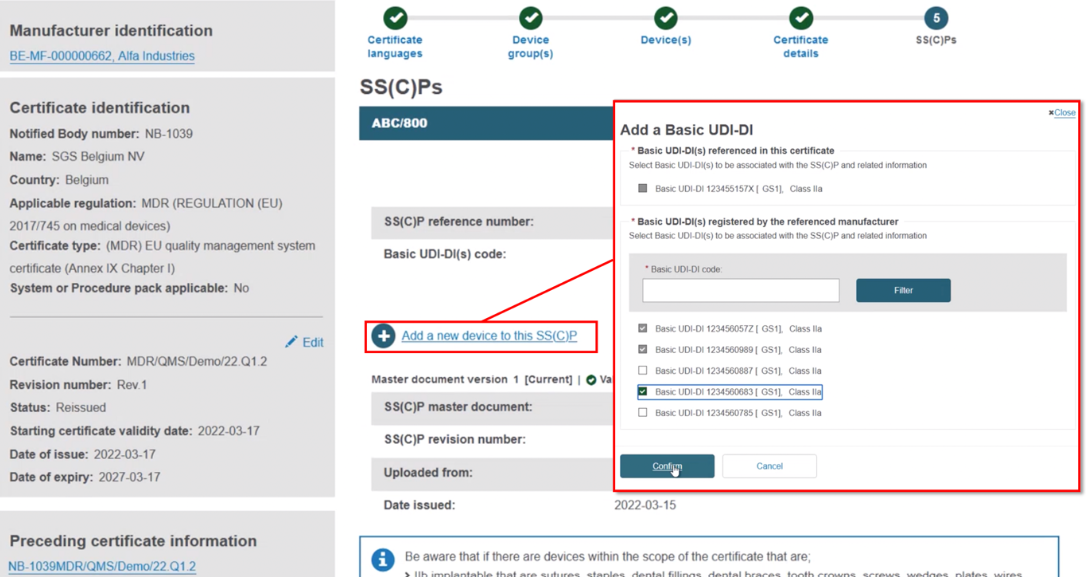
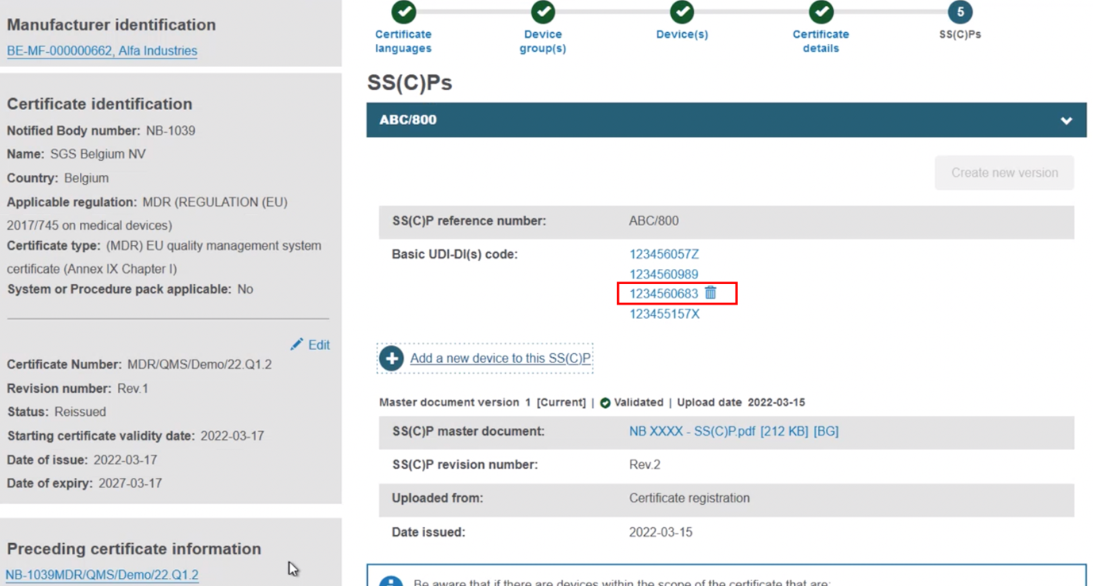
The new device appears next to the dustbin icon. If you save now, the new device will be linked to this version of the SS(C)P:
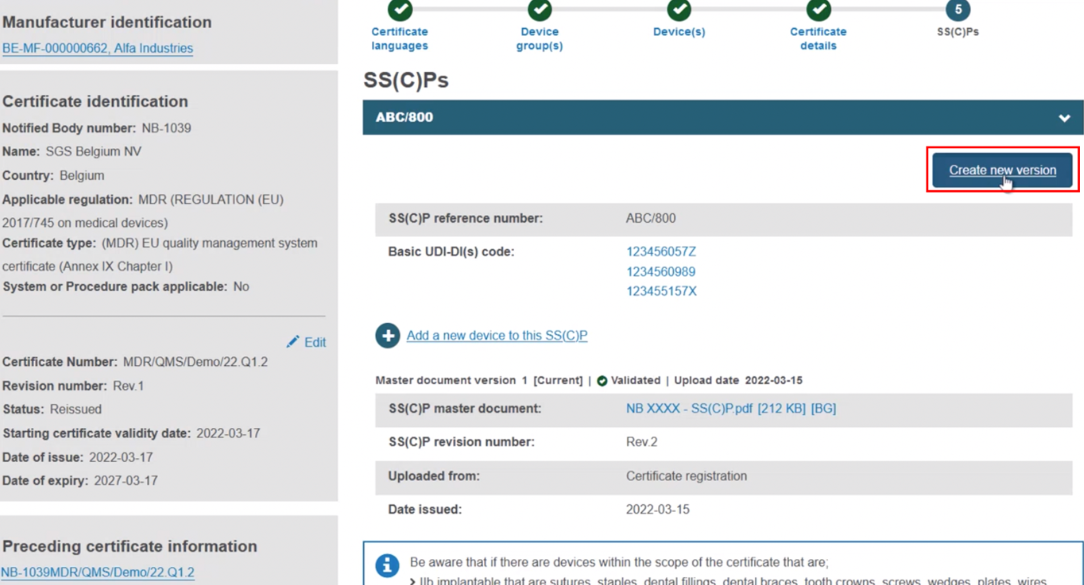
Add devices to a new version of the SS(C)P from the preceding certificate. With this approach, click Create new version:
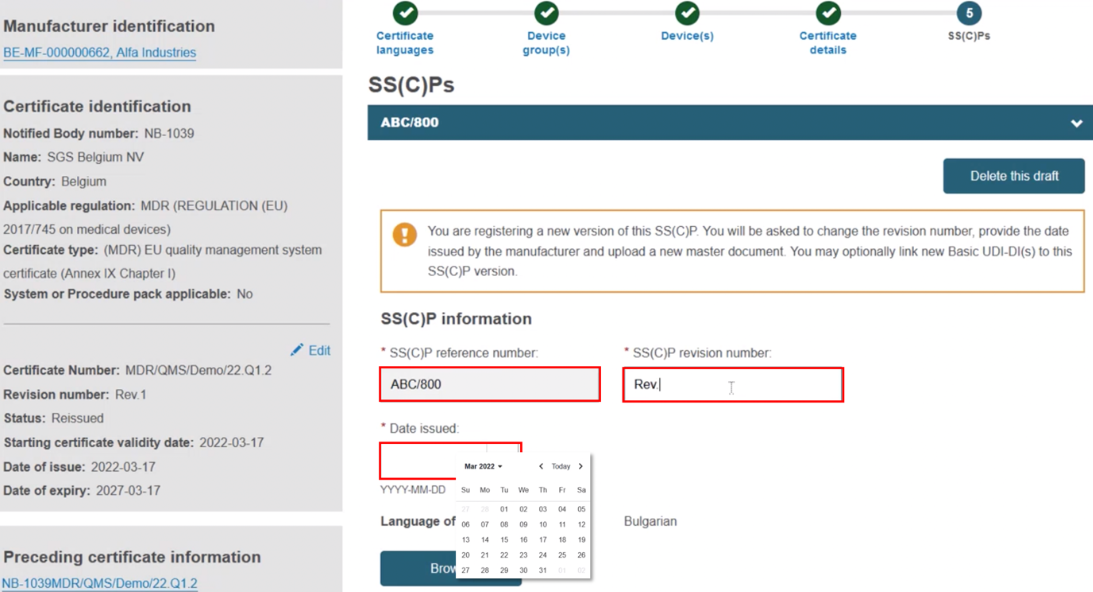
Input the SS(C)P reference number, and create a revision number, then specify the issue date:
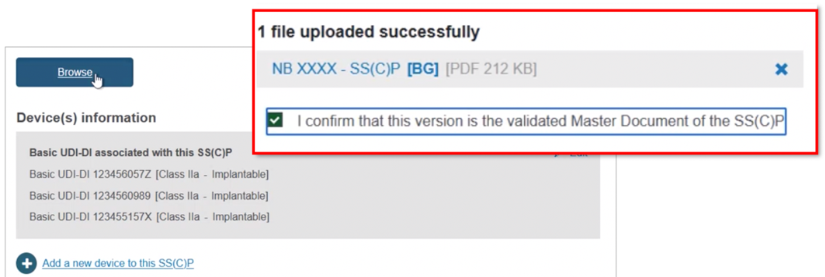
Click Browse to locate and upload the master document, and click to confirm it is validated:
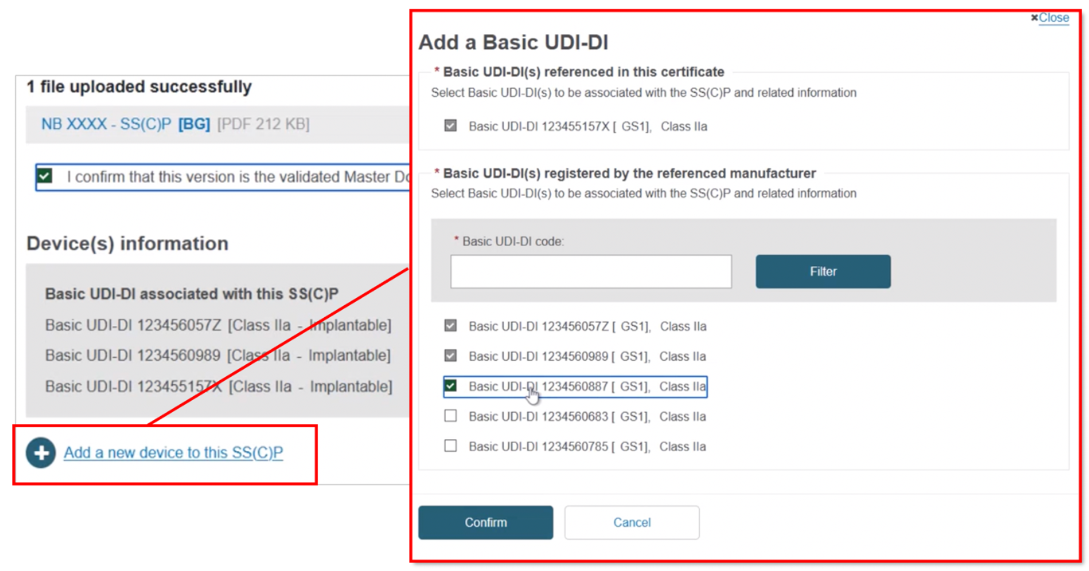
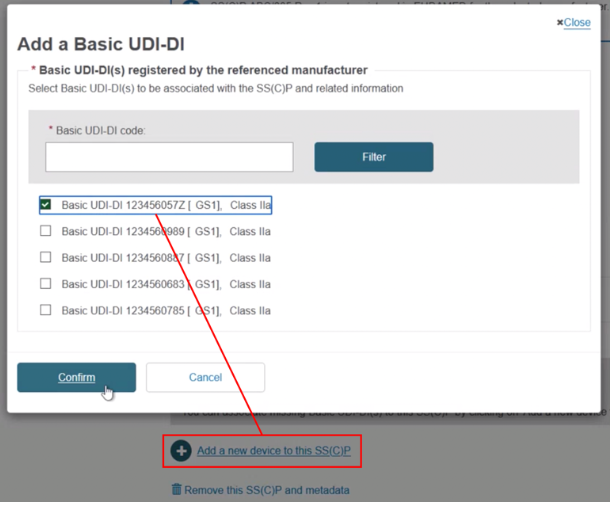
Click + Add a new device to this SS(C)P, locate and select the new device, and click Confirm to link it to this new SS(C)P version:
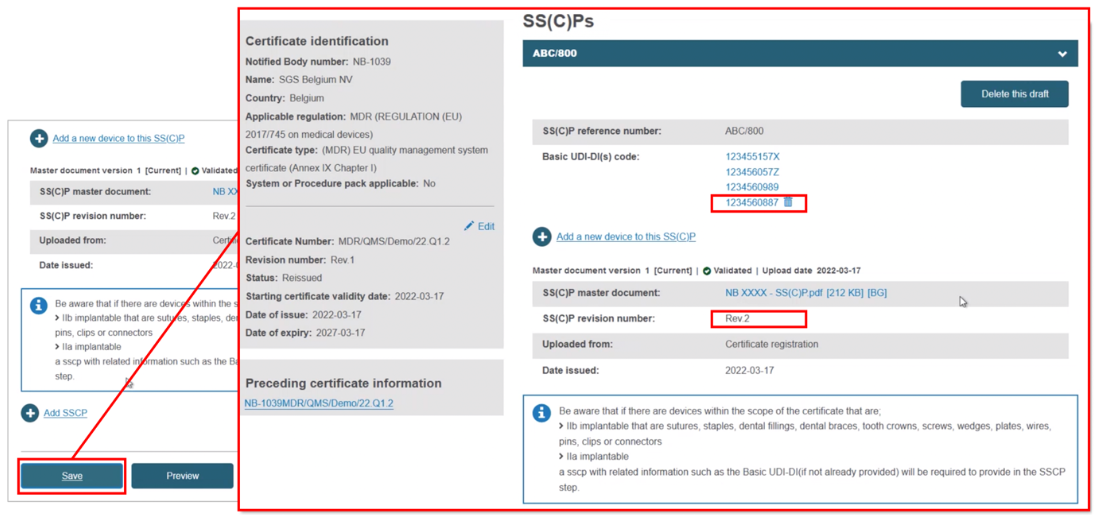
Click Save, and when you register the certificate, this SS(C)P will be saved:
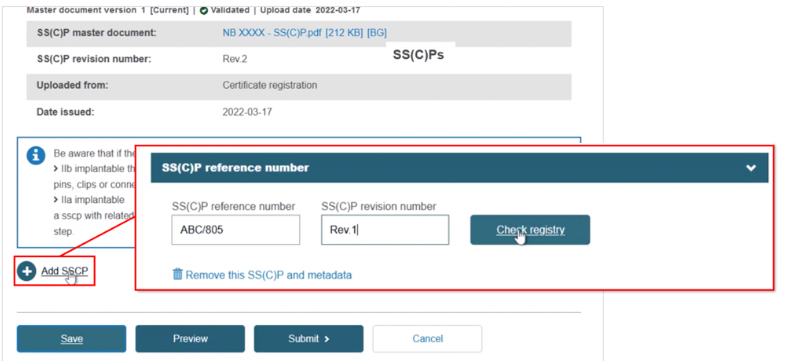
Registering a new SS(C)P, then adding device(s) to it. Click + Add SSCP, then provide the reference and revision number:
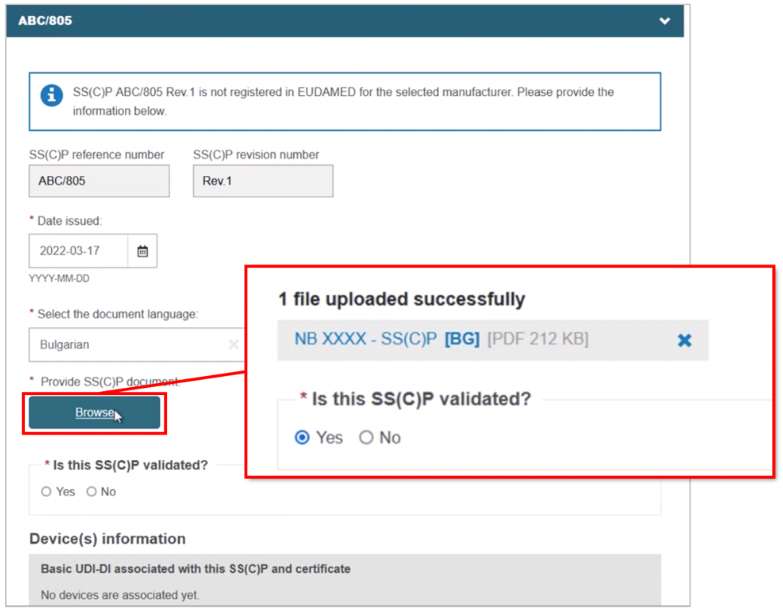
Click Check registry. The system will confirm this is a new SS(C)P:

Complete the fields for the new SS(C)P, including the master document language. Click Browse to locate and upload the master document, confirming it is validated (for Quality-type certificates):
Scroll to the bottom and click + Add a new device to this SS(C)P, then select the device(s). Click Confirm and Save:
After having reviewed all information, click Submit:

The system will prompt you to confirm your submission of a re-issued certificate.
Click Submit my request to finalise the process:

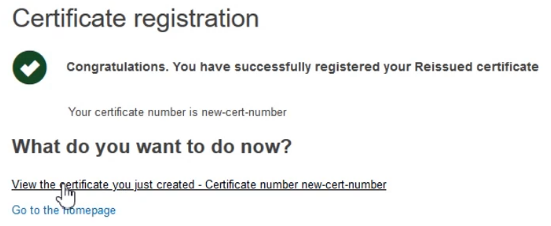
The system will confirm your submission has been successful. You can also view the newly created certificate by clicking on the link provided:
Merging two or more certificates when re-issuing a Quality certificate